Ted392 Mods

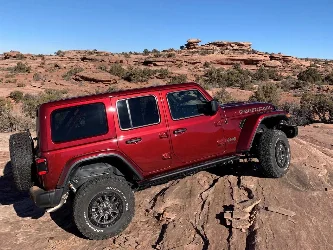
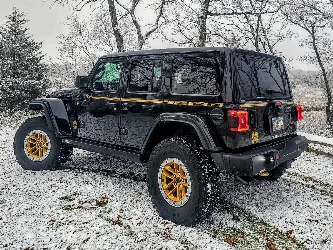
I installed the LOD Destroyers today. 3 hours. Pretty straight forward. The little carriage bolts are a bugger to install. I used a magnet to hold them in while I started the nut. I used a set of jack stands to support them in place while bolting them on. I adjusted them so that the rear portion flowed down the fender curve.

I really like these and I'm glad I got these.

View attachment 8064View attachment 8069View attachment 8065View attachment 8066
View attachment 8068
Here she is at 550 miles. Next up, oil change and other matanence things.
These are first on my list . Been in my garage waiting for the jeep. I'm hoping the install goes as good as it did on our 2 door but they were the old design with the brackets being welded to the step part. I'll have to try your idea with the jack stands. Were they tough to get lined up with the body? The 2 door set lined up right away so I'm not sure why LOD changed the setup of the brackets. Your Jeep is looking great!
 
Thanks. They seem to line up with body (up/down) on their own. I kept all brackets loose, connected sliders loosely, then tightened up frame brackets and then adjusted the sliders front/rear as shown in picture. The passenger side is a tad closer to the rocker then drivers side, like 1/8". No biggie for me.

I was ready to buy RSE, but these really caught my eye by looking at others on this forum.
 
So today was small mod day.

I pre-tensioned the Warn winch line.
I then finished drilling and tapping the 2 rear bolt holes into frame for the LOD Destroyers. They provided 1/2" bolts. To slow rust down, I put antisieze on the threads.
Then I installed the Metalcloak rear swaybar drop spacer. With the 2.5 Fox shocks, the bar comes very close to the shocks and the spacers gained some room between them.
I thought I'd put these spacers before buying a Hellwig type swaybar.
I'll test drive tomorrow to see how/if it changes the ride.

Approaching 1,000 miles!

20221125_153133.webp


20221125_143539.webp
 
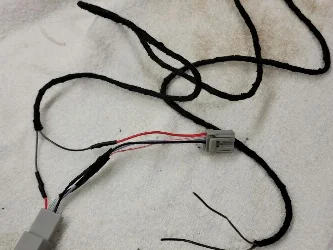
Today I took apart the passenger right side footwell to expose the internal aux harness and to get to the grounding studs. I'm using ACC power for my Midland MTX275 GMRS radio. I looked on both drivers, passengers as well as under seat options for mounting. I ended up fastening it inside the glove box. Close to power, easy to remove and change fuse. It's a small unit so it should survive there.

I still need to rout antenna and handset. For handset, I'll install an RJ panel mount connector somewhere and run a cat6 cable between it and radio. This will allow me to remove handset from view when not in use.

Only one picture.
20221126_151141.webp
 
I got the antenna installed. Just enough wire length from glove box to rear brake light. I'll tidy up the tailgate area in time. The magnetic antenna sits on a metal plate with 3m vhb tape.

For the mic, I have a mount incoming that will vorrectly hold in the position shown but much lower.

Only need to connect power wires and mic extension.
20221127_145252.webp

20221127_145912.webp
 
I've been slacking on this. Since the week after Turkey day, I've been flat out traveling nonstop, 5 states in 4 weeks, plus I tweaked my back. Soon I'll start back at these mods.
Finish radio install.
Kill switch.
Tazer.
Replace front trackbar with adjustable one.
Front door windows tinted.
Rear shelf.

Also multiple road trips starting to be planned for '23: MI, CO, UT, ID, OR.
 
Today I took apart the passenger right side footwell to expose the internal aux harness and to get to the grounding studs. I'm using ACC power for my Midland MTX275 GMRS radio. I looked on both drivers, passengers as well as under seat options for mounting. I ended up fastening it inside the glove box. Close to power, easy to remove and change fuse. It's a small unit so it should survive there.

I still need to rout antenna and handset. For handset, I'll install an RJ panel mount connector somewhere and run a cat6 cable between it and radio. This will allow me to remove handset from view when not in use.

Looks great! If you end up deciding that you need more room in the glove box, there's just enough space behind the passenger kick panel for mounting. I also did the Cat6 extension with a magmic mount.
IMG_1993.webp

magmount3.webp
 
@Stonehide Ya thats a good place too. I thought about that location. What extension cable did you buy? Thanks!

Also, I saw a mic mounted to the grab handle bolt/screw. Can't figure how they did it. Maybe drilled out the screw threads? I bought a bulletpoint mic mount for now.
 
@Stonehide Ya thats a good place too. I thought about that location. What extension cable did you buy? Thanks!

Also, I saw a mic mounted to the grab handle bolt/screw. Can't figure how they did it. Maybe drilled out the screw threads? I bought a bulletpoint mic mount for now.
I ordered 10ft of Cat8 cable, 10ft was more than I needed but left options for alternate mounting if I want.
Cat8 Cable
Bulkhead Adapter

As for the grab handle mount, check out these options:
Jeep Uniq Grab Handle Clip On
Bullet Point Grab Handle Mount
 
Instead of drilling into the dash panel for a Cat6 type bulkhead connector, I bought a 3' extension cable and have downloaded by the passenger's left knee. I'm moving the mic to the grab handle to free up my phone/camera mount.

And Zippy turned 1,000 mile's today. Mostly parked for the winter avoiding MI road salt and getting mods done.
20221231_120431.webp

26895.webp
 
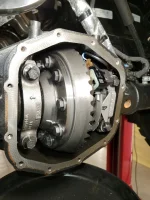
Changed front and rear differential fluid. Blackish with metal flakes as expected. 1,000 miles. Locker solenoids are oil free but I'll seal them up prior to summer trips.
20230107_105724.jpg


And what do you do with these? Just a sample below. Seems all companies spend money on stickers now. Even non jeep companies do it. Marketing waste...
20230107_114935.webp
 

Attachments

  • 20230107_110936.webp
    20230107_110936.webp
    139 KB · Views: 44
Changed front and rear differential fluid. Blackish with metal flakes as expected. 1,000 miles. Locker solenoids are oil free but I'll seal them up prior to summer trips.View attachment 16557

And what do you do with these? Just a sample below. Seems all companies spend money on stickers now. Even non jeep companies do it. Marketing waste...
View attachment 16559
Evey sticker i get goes on the beer fridge in the garage, no other use for them........ Man that diff looks super clean!
 
Today installed chaffing protectors on the sun visor plastic to keep it from wiggling. Also installed a spring C clip on the back side where the wire goes in to the tube. Seems secure for now.

Also had a leak in back passenger side panel. Saw that the panel had slack in the latch. I the adjusted the metal bracket on the top that the latch connects to. Much better. Also had to trim the rubber on same panel. Would not tuck into the seam like drivers side. So I trimmed it just enough to go into the joint.

20230115_140920.webp
20230115_140444.webp

20230115_140436.webp
 
Got some mods done. Sector shaft reinforcement, 1" front leveler spacers, .5 rear, ands Fox 2.0 shocks. Next up is to relocate parking brake cables.

View attachment 7741View attachment 7742View attachment 7743View attachment 7744View attachment 7745
Ted, you used 1” in the front and .5” in the rear. Did you have much of a rake before you installed the winch? I already have just over .5” rake before I add the winch and was wondering if I need to bump the front 1.5” to accommodate the winch.
 
Ted, you used 1” in the front and .5” in the rear. Did you have much of a rake before you installed the winch? I already have just over .5” rake before I add the winch and was wondering if I need to bump the front 1.5” to accommodate the winch.
From memory, the front dropped about .25" with winch added. I really added the 1" to reclaim the .25 plus increase bump stop spacing. Plus I believe the 392 engine weight will settle the oem springs over time. Then I added the rear .5 and it sat pretty level. But now, with 2k miles on it and a 600 mile road trip with new half doors loaded in back, the rear is down about .25". Last weekend I ordered another .5" rear.

Currently it sits about .5 lower front and rear on the passengerside with a full tank of 93!

I'm thinking that after this summer off road trips, I pull the pucks and go with new springs.
 
From memory, the front dropped about .25" with winch added. I really added the 1" to reclaim the .25 plus increase bump stop spacing. Plus I believe the 392 engine weight will settle the oem springs over time. Then I added the rear .5 and it sat pretty level. But now, with 2k miles on it and a 600 mile road trip with new half doors loaded in back, the rear is down about .25". Last weekend I ordered another .5" rear.

Currently it sits about .5 lower front and rear on the passengerside with a full tank of 93!

I'm thinking that after this summer off road trips, I pull the pucks and go with new springs.
I am looking at new springs as well but was hoping to avoid the additional cost if the pucks would suffice. It seems, however, that based on your comments as well as others, coil springs are the best long term solution.
 
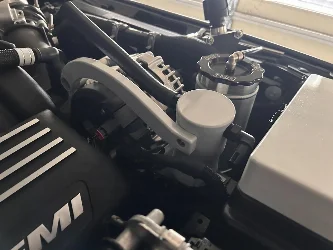
So I bought a cable hood release kit for hotrod type car builds. It includes the cable, lever, and latch mechanism. I was curious to see if the mechanism would somehow fit without modification of the 392 hood or grill sub-frame.

Removed grill.

For the hood, I removed the the safety latch (the new mechanism would become the new safety latch) and fitted the top plate of mechanism with the stud. Leave oem spring assembly. Drilled new holes in the plate and used the existing hoods threaded holes for the safety latch. I placed a white delrin spacer against hood to protect hood paint.

For the grill sub-frame (rectangular tube) portion of the mechanism, I trimmed a flat stock piece of aluminum and inserted it inside the frame. Then drilled holes the aluminum to attach the the female side of mechanism below the frame. It took some to line it up but it fits well.

The stud needed to be extended about 1/2" so I welded a bolt to the stud.

Lined everything up and it works! No cutting or drilling of the 392.

I snaked the cable in from drivers side and I will tackle that next. Need to make a bracket for the lever assembly. Then trim cable to length.

I have to take it all back apart and will take pictures of all parts used and made.

So there is a way to secure the hood from inside the 392.
20230129_135845.webp

20230129_135833.webp

Screenshot_20230204_165053_Video Editor.webp

Screenshot_20230204_165108_Video Editor.webp

Screenshot_20230204_165148_Video Editor.webp
 

Create an account or login to comment

Join now to leave a comment enjoy browsing the site ad-free!

Create account

Create an account on our community. It's easy!

Log in

Already have an account? Log in here.

Latest Discussions

Back
Top