Navigation
Install the app
How to install the app on iOS
Follow along with the video below to see how to install our site as a web app on your home screen.
Note: This feature may not be available in some browsers.
More options
You are using an out of date browser. It may not display this or other websites correctly.
You should upgrade or use an alternative browser.
You should upgrade or use an alternative browser.
redbeard719's 392 build...
- Thread starter redbeard719
- Start date

GNX Guy
Member
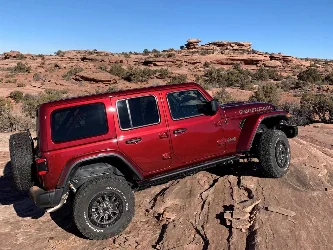
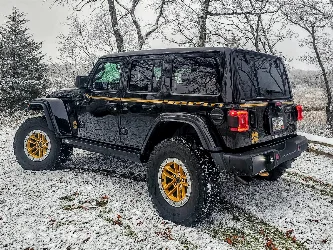
Narrowed my order down to this or Anvil
- Thread starter
- #63
Both are great options. For me, I’m a sucker for the metallic and/or pearl paints!

- Thread starter
- #64
Post-lift alignment was done this morning. I wasn't too far off initially, but of course it's much more dialed-in now. It's truly amazing how small adjustments have such a significant impact.
It drives fantastically. The Clayton lift eliminated so much of the body roll, and the Falcon shocks on the #1 (soft setting) are really great. Going to try the steering stabilizer on medium, but even on soft it still handles great.

It drives fantastically. The Clayton lift eliminated so much of the body roll, and the Falcon shocks on the #1 (soft setting) are really great. Going to try the steering stabilizer on medium, but even on soft it still handles great.


- Thread starter
- #66
Spent some time on the trails this weekend.
We hit Yankee Boy Basin, and Engineer Pass. The 392 did absolutely awesome!
Wanted to hit Black Bear Pass and Imogene Pass, but both were closed. Guess we’ll have to go back this fall when the Aspens are turning…


We hit Yankee Boy Basin, and Engineer Pass. The 392 did absolutely awesome!
Wanted to hit Black Bear Pass and Imogene Pass, but both were closed. Guess we’ll have to go back this fall when the Aspens are turning…

Can you tell me which part # you used for the Fumoto?This last weekend I managed to complete the Clayton 2.5" Overland+ lift kit. It included all 8 control arms, front and rear track bars, coils, Falcon 3.3 Piggyback shocks, Falcon Nexus EF 2.2 steering stabilizer, and the CurrectLync Steering Upgrade by John Currie/Rock Jock (upgraded tie rod, drag link, and steering stabilizer relocation bracket). I also added Artec rear lower control arm/shock mount skids, and Rusty's front track bar reinforcement bracket.
I don't have any after pictures yet, but I'm loving the new stance. The kit eliminated almost all of the rake - and should do well when I add my winch this weekend. Here's a couple gratuitous shots from during the install.
Still to come are the parking brake cable brackets from Synergy and Rancho. Once they're both here, I'll decide which one I want to go with, but that will not take very long to wrap up the install.
Alignment is scheduled for Friday morning.
After work today was extremely productive. I installed a Bestop Sunrider. Nice and easy. Then I changed the oil (594 miles on the odometer) - the factory oil was nice and clean, though a little dark. Not bad at all. I also took the opportunity to install a Fumoto oil drain valve, so that I could make future changes easier as I was also adding an Artec engine oil pan/transmission skid. That install went very well too, no issues at all. Plenty of clearance around the exhaust crossover too.
View attachment 23626
View attachment 23627
View attachment 23628
View attachment 23629
View attachment 23630
View attachment 23632
View attachment 23633
- Thread starter
- #68
I went with this one:Can you tell me which part # you used for the Fumoto?
F106S - Engine Oil Drain Valve with Short Nipple 14mm-1.5 | FUMOTO
These valves have 5 mm (0.2") short hose nipples and are recommended for vehicles with low ground clearance. Our plastic sockets (SH-10 or SL-10) are necessary to securely connect a hose to the nipple.
 www.fumotousa.com
I also recommend the drain adapter kit and the snap on cover.
HK-3/8: Hose Kit for 3/8" OD Nipples
Using this hose kit with the valve allows you to drain oil through the hose and manipulate the oil flow into your container.
 www.fumotousa.com
NC-10: Nipple Cap For Fumoto Valves With 3/8" Nipples
The NC-10 is made to fit perfectly on Fumoto valve nipples and to prevent dust and dirt from entering the valve while the vehicle is on the road.
 www.fumotousa.com
Thank you! I have the hose kit already from my JK, just didn’t know which was the right valve for the 392. Love the fumoto for sure.I went with this one:
F106S - Engine Oil Drain Valve with Short Nipple 14mm-1.5 | FUMOTO
These valves have 5 mm (0.2") short hose nipples and are recommended for vehicles with low ground clearance. Our plastic sockets (SH-10 or SL-10) are necessary to securely connect a hose to the nipple.
I also recommend the drain adapter kit and the snap on cover.
HK-3/8: Hose Kit for 3/8" OD Nipples
Using this hose kit with the valve allows you to drain oil through the hose and manipulate the oil flow into your container.
NC-10: Nipple Cap For Fumoto Valves With 3/8" Nipples
The NC-10 is made to fit perfectly on Fumoto valve nipples and to prevent dust and dirt from entering the valve while the vehicle is on the road.
- Thread starter
- #70
Thank you! I have the hose kit already from my JK, just didn’t know which was the right valve for the 392. Love the fumoto for sure.
You bet!
I have a Fumoto valve on my 2021 GMC Sierra Duramax, so I also already had the hose kit too. That valve has been fantastic on the truck for easy and clean oil changes. When I know it's getting time for an oil change, I start holding onto gallon containers (milk, washer fluid, etc). Being able to drain directly into a container, turn off the valve, and swap to a new container without spilling a drop is convenient, especially when dealing with 10 quarts of oil to drain.
My biggest reason for adding the Fumoto onto the 392 was that I was adding an Artec engine/trans skid.
Any of the F106 valves should work for you, but I preferred the F106S to tuck up nicely behind that skid. Plenty of room though for the long nipple or adjustable one, if you wanted to go with either of those options.
I ordered the same short nipple version. I also have the Artec skids, but you never know…would prefer to keep as much clearance as possible.You bet!
I have a Fumoto valve on my 2021 GMC Sierra Duramax, so I also already had the hose kit too. That valve has been fantastic on the truck for easy and clean oil changes. When I know it's getting time for an oil change, I start holding onto gallon containers (milk, washer fluid, etc). Being able to drain directly into a container, turn off the valve, and swap to a new container without spilling a drop is convenient, especially when dealing with 10 quarts of oil to drain.
My biggest reason for adding the Fumoto onto the 392 was that I was adding an Artec engine/trans skid.
Any of the F106 valves should work for you, but I preferred the F106S to tuck up nicely behind that skid. Plenty of room though for the long nipple or adjustable one, if you wanted to go with either of those options.
Agree on the ease of oil changes with the fumoto. I loved it on my JK. Now, if there was just a solution to make the filter swap a little cleaner

@Socal_392 Sorry for jumping in here......but I think I can offer a solution on the filter swap (I just did this a few weekends past for my 1st 500 mile change). I actually came across this idea while researching how to minimize the mess changing out the oil filter on my Ram 3500 diesel. Trust me the filter had JUST enough room to drop down, however had to tilt 90 degrees to come straight out a tiny window into the passenger wheel well.....thus would have dumped every drop out. Dude posted a video on YouTube somewhere....... you take a gallon ziplock bag and surround the filter after you break it loose...then just spin it off inside the ziplock..... and Voila all the oil gets caught inside the ziplock. Amazing how stupid you can feel (after coming across a video) and so many years cleaning up the mess of oil filters that aren't situated perfectly up and down and can go on and off with no tilting and with no spill. This worked for me, and hope you give it a try. CheersI ordered the same short nipple version. I also have the Artec skids, but you never know…would prefer to keep as much clearance as possible.
Agree on the ease of oil changes with the fumoto. I loved it on my JK. Now, if there was just a solution to make the filter swap a little cleaner

Amazing thank you for the idea@Socal_392 Sorry for jumping in here......but I think I can offer a solution on the filter swap (I just did this a few weekends past for my 1st 500 mile change). I actually came across this idea while researching how to minimize the mess changing out the oil filter on my Ram 3500 diesel. Trust me the filter had JUST enough room to drop down, however had to tilt 90 degrees to come straight out a tiny window into the passenger wheel well.....thus would have dumped every drop out. Dude posted a video on YouTube somewhere....... you take a gallon ziplock bag and surround the filter after you break it loose...then just spin it off inside the ziplock..... and Voila all the oil gets caught inside the ziplock. Amazing how stupid you can feel (after coming across a video) and so many years cleaning up the mess of oil filters that aren't situated perfectly up and down and can go on and off with no tilting and with no spill. This worked for me, and hope you give it a try. Cheers
GNX Guy
Member
Hi,The Synergy and Rancho Parking Brake Relocation brackets both came today, and both are nice products.
I ended up going with the Rancho as I preferred its routing method for the cables. Bonus that it uses the OEM bracket to secure the cables too.
Here it is installed. I’m getting freakishly good at disconnecting the parking brake cables from the rear of the brakes and removing the cables from the bosses on the axle. The install didn’t even take me ten minutes, start to finish!
One last thing - based on the wear-through that @Ted392 had on his cables, I decided as a precautionary measure to put some rubber caps on the two highest threaded bosses on the top of the rear differential. These are just like you’d see on a set of crutches, except smaller and black. They are a snug fit and I don’t expect they’ll pop off on their own. Ace Hardware carries them.
Hopefully this prevents any wear on the cables, though they do sit down in front of those bosses without making contact.
View attachment 23661
View attachment 23662

WHat was the reason you wanted / needed to relocate the parking break cables? I'm installing a Metal Cloak 3.5" game changer lift with Falcon shocks. Thank you
- Thread starter
- #75
Hi,
WHat was the reason you wanted / needed to relocate the parking break cables? I'm installing a Metal Cloak 3.5" game changer lift with Falcon shocks. Thank you
When you install the lift and longer shocks, the amount of axle droop/travel will increase significantly. The parking brake cables need to be rerouted to accommodate the extended travel.
When they’re rerouted, they need something to hold them in place or it’s possible they’ll be in contact with other components of the undercarriage/axle housing that can cause premature wear through the cables.
If they’re not rerouted to accommodate the extended axle travel, other damage would occur, possibly tearing the cables, etc.
GNX Guy
Member
Thank you sir. Wonder why they don’t include this with lift kits.When you install the lift and longer shocks, the amount of axle droop/travel will increase significantly. The parking brake cables need to be rerouted to accommodate the extended travel.
When they’re rerouted, they need something to hold them in place or it’s possible they’ll be in contact with other components of the undercarriage/axle housing that can cause premature wear through the cables.
If they’re not rerouted to accommodate the extended axle travel, other damage would occur, possibly tearing the cables, etc.
- Thread starter
- #77
I agree, you’d think a relocation bracket would be included with most of these lift kits, but it seems overlooked.Thank you sir. Wonder why they don’t include this with lift kits.
FWIW, I also had to separately purchase brake line relo brackets for my front brake lines. Now, I only did a 2.5” lift kit, and my understanding is that Clayton includes the brackets for their 3.5” offerings. In the overall scheme of things, the relo brackets were small costs in comparison. Maybe neither wasn’t 100% needed, but I felt it was the right way to do it.

I concur I just went through this. I lifted the Jeep drooped the rear axel slowly and watched my ebrake cables get tighter and tighter. I stopped b4 full droop ordered a relocate bracket . Now plenty of slack . Cables now go under crossmember.You just have to watch where they rub on the cast iron bosses on top of the diff. As they have a sharp edge. I put sae washers and button head bolts in all four holes. It gives a smooth surface for the cables to glide over. The diesel does not have these bosses on top of the differentia.at least my friends doesn’t.I agree, you’d think a relocation bracket would be included with most of these lift kits, but it seems overlooked.
FWIW, I also had to separately purchase brake line relo brackets for my front brake lines. Now, I only did a 2.5” lift kit, and my understanding is that Clayton includes the brackets for their 3.5” offerings. In the overall scheme of things, the relo brackets were small costs in comparison. Maybe neither wasn’t 100% needed, but I felt it was the right way to do it.
B4 bracketI concur I just went through this. I lifted the Jeep drooped the rear axel slowly and watched my ebrake cables get tighter and tighter. I stopped b4 full droop ordered a relocate bracket . Now plenty of slack . Cables now go under crossmember.You just have to watch where they rub on the cast iron bosses on top of the diff. As they have a sharp edge. I put sae washers and button head bolts in all four holes. It gives a smooth surface for the cables to glide over. The diesel does not have these bosses on top of the differentia.at least my friends doesn’t.View attachment 29491View attachment 29492
- Thread starter
- #80
It's been a little while since I've had an update, but I've added some extras lately.
I picked up a set of cowl mounts that were inspired by @WhiteBronze392. They arrived with a satin/matte powder coating, but I wanted to add a second hole to be used with the light mounting bracket for the LP4. So, after drilling an additional hole, I brought them to be stripped and re-coated, and attempted to do a color match to the Hydro Blue.
They turned out really nice, but the color was just a shade darker, despite the swatch being nearly perfect.
Not wanting to have a ton of different finishes, I reached out to Maximus-3 and got the info for their powder coater. I figured I would match them to the Maximus-3 bumper hoop.
So, I sent them off to Michigan along with a couple other parts, and they turned out awesome. Then I decided I would order some black stainless hardware for the lights to eliminate the raw stainless that was provided by Baja Designs.
Finally, I have the Baja Designs LP4 spots mounted on the cowls, along with the IPT block off covers on the inside of each light and lastly the clear lens covers. Lens covers and/or lenses can easily be swapped out to amber if I decide to do that later on.
I have a couple other things on the list, but haven't gotten around to completing them just yet. I'll have extra updates soon, hopefully.