redbeard719's 392 build...

I spoke with Artec this morning - their 392 oil/trans only skids are showing backorder. They are expecting shipments to go out in the next 2-2.5 weeks. So I ordered that skid, the front and rear differential covers, and rear lower control arm/shock mount skid pieces. The 20% off sale pushed me over the edge! 🤣

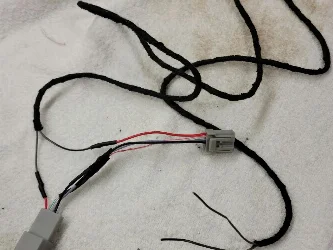
In prep for the winch install, I cut and drilled out a piece of 1/8" aluminum angle to mount the Warn power interrupt kit. It fits perfectly on the passenger side fender, right next to the fuse block. The OEM aux wires should also reach, but if not quite it'll be easy enough to extend.

Here's a crude mock up with it installed. No clearance issues with closing the hood either. I've since wet-sanded it with 400grit, and as soon as the weather cooperates, it'll be shot with some black Rust-o-leum paint. I also have some adhesive-backed rubber that I'll put on the bottom of it so it doesn't damage the Jeep's paint.

View attachment 22644

View attachment 22645
Awesome! After I saw that on the skid buying separately I started second guessing lol
 
Couple small things over the last few days have been completed.

I added a CarPlay USB connection and USB/USB-C charging port into the cubby on the dash.

My placement was great for allowing the 8.4” UConnect screen to fit back into place without issue. But….unless I opt for some 90° adapters and such, the 67 Designs rail won’t sit fully flush.

Since I really don’t need a rail for several mounting balls, I ordered the end pieces and a single ball from 67 Designs that will work perfectly. The rail is for sale.

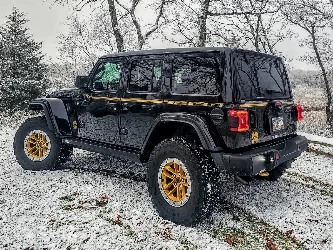
Also, I swapped the full doors for half doors. Had to do some minor adjusting for proper alignment, but overall I think they’re cool.

Just waiting on the extra set of magnets to arrive to put on the half doors for the RSE step switches to work correctly.

70882191289__C18807C8-7CCF-4B3D-918B-C8CEC891F887.webp


70906344801__BE70A85A-4238-46FA-803A-A712F30C6618.fullsizerender.webp


IMG_9268.webp
 
Couple small things over the last few days have been completed.

I added a CarPlay USB connection and USB/USB-C charging port into the cubby on the dash.

My placement was great for allowing the 8.4” UConnect screen to fit back into place without issue. But….unless I opt for some 90° adapters and such, the 67 Designs rail won’t sit fully flush.

Since I really don’t need a rail for several mounting balls, I ordered the end pieces and a single ball from 67 Designs that will work perfectly. The rail is for sale.

Also, I swapped the full doors for half doors. Had to do some minor adjusting for proper alignment, but overall I think they’re cool.

Just waiting on the extra set of magnets to arrive to put on the half doors for the RSE step switches to work correctly.

View attachment 22810

View attachment 22811

View attachment 22812

Nice install. I have a similar USB setup under my Bulletpoint mount. I got these right angle USB adapters from Amazon. They come with both a right and left facing one in a single pack so you have some versatility. Worked well for me.

https://www.amazon.com/gp/product/B0BRGRB4CT/?tag=jeep392-20
 
Nice install. I have a similar USB setup under my Bulletpoint mount. I got these right angle USB adapters from Amazon. They come with both a right and left facing one in a single pack so you have some versatility. Worked well for me.

https://www.amazon.com/gp/product/B0BRGRB4CT/?tag=jeep392-20
Thanks for the link! I actually ordered those and ended up returning them. In the end, I felt like I didn't want to cover up the ports to where I couldn't easily get to them if needed. But they definitely would have worked.

Knowing that Apple is changing the Lightning port to USB-C on the next iPhone nudged me to not want to have to remove the rail to change cables.

Not sure if I'll end up mounting the single ball in the middle any time soon since I don't have a GoPro yet - though I would like to get one. At least I'll have it when the time comes.
 
UPS just brought the extra set of magnets, so the steps are back to normal now.

And thanks again for the tip about the storage bag for the uppers. That came today also, so now I have a place to put the windows!
Glad you finally got them!
 
It was a productive weekend...

Saturday, I completed the headlight swap from OEM to Diode Dynamics Elite Max. The DD lights are very impressive, and that's not to say I wasn't already impressed by the OEM LED lights.

Sunday, I knocked out the Epic Kraken ARB dual compressor kit with the Epic Kraken Pressure Control kit. It works really well, and I'm pretty happy with it. Having BlueTooth control over the whole deal is pretty cool, and I'm sure will end up being convenient. At least I won't have to sit in the Jeep and keep watching the DIC to see the pressure of each tire when airing up.

Also, since I was messing with the seats, I installed the Desert Does It Shorty Sear Jackers. It’s remarkable how much more comfortable the seating positions are now. It’s like the seat actually cradles you now, instead of feeling like you’ll slide forward out of it.

IMG_9367.webp


IMG_9369.webp


IMG_9364.webp


IMG_9365.webp
 
The Goose Gear Tailgate table is now installed. It’s very well designed and made.

It’s a very clean set up, with easy installation. No drilling, and all hardware is provided too. No rattles either, which was a concern.

My helper, Mango, approves!

View attachment 22531

View attachment 22532

View attachment 22533
I really like your build. I have a white one that is otherwise very similar. I have been contemplating the goose gear tailgate shelf. It is horribly expensive, but I really like that the hinges do not interfere with a drawer slide out like many of the cable systems do. Do you mind telling me how far out the hinge and latch sticks out from the table in the closed position? I want to make sure it clears my cooler and drawers.
 
I really like your build. I have a white one that is otherwise very similar. I have been contemplating the goose gear tailgate shelf. It is horribly expensive, but I really like that the hinges do not interfere with a drawer slide out like many of the cable systems do. Do you mind telling me how far out the hinge and latch sticks out from the table in the closed position? I want to make sure it clears my cooler and drawers.

Thanks @Cali392JL!

I agree, the Goose Gear stuff comes at a premium. But I will say the quality matches/exceeds the price.

As for the table, the bottom hinge is the deepest part. It measures in at about 2 1/4” inches from the tailgate.

IMG_9371.webp
 
It was a productive weekend...

Saturday, I completed the headlight swap from OEM to Diode Dynamics Elite Max. The DD lights are very impressive, and that's not to say I wasn't already impressed by the OEM LED lights.

Sunday, I knocked out the Epic Kraken ARB dual compressor kit with the Epic Kraken Pressure Control kit. It works really well, and I'm pretty happy with it. Having BlueTooth control over the whole deal is pretty cool, and I'm sure will end up being convenient. At least I won't have to sit in the Jeep and keep watching the DIC to see the pressure of each tire when airing up.

Also, since I was messing with the seats, I installed the Desert Does It Shorty Sear Jackers. It’s remarkable how much more comfortable the seating positions are now. It’s like the seat actually cradles you now, instead of feeling like you’ll slide forward out of it.

View attachment 23206

View attachment 23207

View attachment 23208

View attachment 23209
Looks great! My work got postponed for a day but installed the IAT system today
 
I have one of the goose gear tables that should be here next week. Appreciate the picture and measurement.
 
I have one of the goose gear tables that should be here next week. Appreciate the picture and measurement.

I’ve been pleased with it. It’s quiet, no rattles.

I actually just ordered the Goose Gear Stealth sleep system with full rear seat delete tonight. Hopefully it will be here sooner than the stated lead times, but I won’t hold my breath!
 
I have the full seat delete in mine. I would definitely add some sound deadener while you have everything out. Even with the hotheadz and sound deadener, the platform makes the back end an echo chamber without the seats in it. The fitment of the full platform was not all that impressive. I had to trim the platform in the front so the seats could slide all the way back. I just trimmed it and applied some of the cheap roll on black bedliner stuff so it pretty much matches the bedliner like spray that goose uses on the plywood.
 
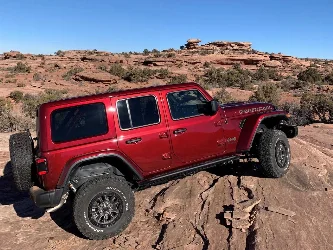
This last weekend I managed to complete the Clayton 2.5" Overland+ lift kit. It included all 8 control arms, front and rear track bars, coils, Falcon 3.3 Piggyback shocks, Falcon Nexus EF 2.2 steering stabilizer, and the CurrectLync Steering Upgrade by John Currie/Rock Jock (upgraded tie rod, drag link, and steering stabilizer relocation bracket). I also added Artec rear lower control arm/shock mount skids, and Rusty's front track bar reinforcement bracket.

I don't have any after pictures yet, but I'm loving the new stance. The kit eliminated almost all of the rake - and should do well when I add my winch this weekend. Here's a couple gratuitous shots from during the install.

Still to come are the parking brake cable brackets from Synergy and Rancho. Once they're both here, I'll decide which one I want to go with, but that will not take very long to wrap up the install.

Alignment is scheduled for Friday morning.

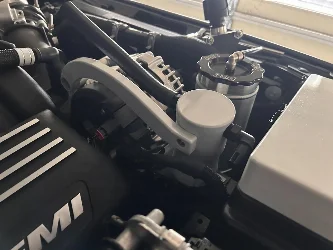
After work today was extremely productive. I installed a Bestop Sunrider. Nice and easy. Then I changed the oil (594 miles on the odometer) - the factory oil was nice and clean, though a little dark. Not bad at all. I also took the opportunity to install a Fumoto oil drain valve, so that I could make future changes easier as I was also adding an Artec engine oil pan/transmission skid. That install went very well too, no issues at all. Plenty of clearance around the exhaust crossover too.

71053123526__92A61336-C183-4348-A5F1-DF7FC56F7514.webp


IMG_9403.webp


IMG_9404.webp


IMG_9416.webp


IMG_9408.webp


IMG_9413.webp


IMG_9414.webp
 
This last weekend I managed to complete the Clayton 2.5" Overland+ lift kit. It included all 8 control arms, front and rear track bars, coils, Falcon 3.3 Piggyback shocks, Falcon Nexus EF 2.2 steering stabilizer, and the CurrectLync Steering Upgrade by John Currie/Rock Jock (upgraded tie rod, drag link, and steering stabilizer relocation bracket). I also added Artec rear lower control arm/shock mount skids, and Rusty's front track bar reinforcement bracket.

I don't have any after pictures yet, but I'm loving the new stance. The kit eliminated almost all of the rake - and should do well when I add my winch this weekend. Here's a couple gratuitous shots from during the install.

Still to come are the parking brake cable brackets from Synergy and Rancho. Once they're both here, I'll decide which one I want to go with, but that will not take very long to wrap up the install.

Alignment is scheduled for Friday morning.

After work today was extremely productive. I installed a Bestop Sunrider. Nice and easy. Then I changed the oil (594 miles on the odometer) - the factory oil was nice and clean, though a little dark. Not bad at all. I also took the opportunity to install a Fumoto oil drain valve, so that I could make future changes easier as I was also adding an Artec engine oil pan/transmission skid. That install went very well too, no issues at all. Plenty of clearance around the exhaust crossover too.

View attachment 23626

View attachment 23627

View attachment 23628

View attachment 23629

View attachment 23630

View attachment 23632

View attachment 23633
I am so having second thoughts and wanting the Artec skid 🥲
 
I am so having second thoughts and wanting the Artec skid 🥲
Hahaha, I hear you on that. Install was a snap cause it was so lightweight!

Now I'm already starting to think that I should have added the full belly skid. But really, I was most concerned with that front area. I know it's tucked up there, but it was sooo nekkid and exposed!
 
Hahaha, I hear you on that. Install was a snap cause it was so lightweight!

Now I'm already starting to think that I should have added the full belly skid. But really, I was most concerned with that front area. I know it's tucked up there, but it was sooo nekkid and exposed!
Of everything I’ve done skids was the thing I’ve debated most!
 
The Synergy and Rancho Parking Brake Relocation brackets both came today, and both are nice products.

I ended up going with the Rancho as I preferred its routing method for the cables. Bonus that it uses the OEM bracket to secure the cables too.

Here it is installed. I’m getting freakishly good at disconnecting the parking brake cables from the rear of the brakes and removing the cables from the bosses on the axle. The install didn’t even take me ten minutes, start to finish! 😎

One last thing - based on the wear-through that @Ted392 had on his cables, I decided as a precautionary measure to put some rubber caps on the two highest threaded bosses on the top of the rear differential. These are just like you’d see on a set of crutches, except smaller and black. They are a snug fit and I don’t expect they’ll pop off on their own. Ace Hardware carries them.

Hopefully this prevents any wear on the cables, though they do sit down in front of those bosses without making contact.

IMG_9418.webp


IMG_9420.webp
 

Create an account or login to comment

Join now to leave a comment enjoy browsing the site ad-free!

Create account

Create an account on our community. It's easy!

Log in

Already have an account? Log in here.

Back
Top