🛠️ What did you do to your Jeep 392 today?

So I looked into the Gthaus exhaust designed for JL 392, I think you are the only person that I've heard installed this system. By looking at the pictures, it doesn't seem that we can reuse the active exhaust button since I don't see the vacuum actuators being used anywhere, is this true? They offer titanium tips which is unbeatable!
I went and looked at it also, there are 2 options 1 with 1 without the actuators. It was about a $500 difference in price between the two. If you toggle between the two performance options is where it's at. I myself still like the AWE I think it tucks up higher?
 
I went and looked at it also, there are 2 options 1 with 1 without the actuators. It was about a $500 difference in price between the two. If you toggle between the two performance options is where it's at. I myself still like the AWE I think it tucks up higher?
I’m with you, and not sure how it fits the oem rear bumper too. AWE still is the one I’ll go with. Nice to have options to compare.
 
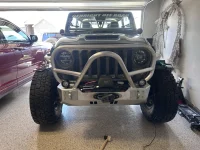
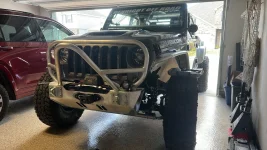
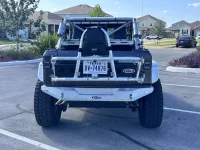
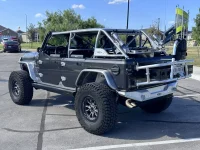
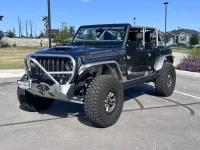
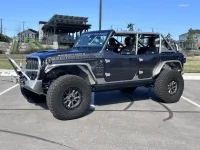
Added the Genright stinger bumper! 😎
 

Attachments

  • IMG_9614.webp
    IMG_9614.webp
    266.1 KB · Views: 49
  • 67BF12F8-6287-4C9E-BDB7-2E22ED93CD96.webp
    67BF12F8-6287-4C9E-BDB7-2E22ED93CD96.webp
    190.1 KB · Views: 51
So I looked into the Gthaus exhaust designed for JL 392, I think you are the only person that I've heard installed this system. By looking at the pictures, it doesn't seem that we can reuse the active exhaust button since I don't see the vacuum actuators being used anywhere, is this true? They offer titanium tips which is unbeatable!
It works just as stock, using the same activation both under WOT, and via the dash button. FWIW, GTHaus has the contract for Mopar to design and test exhausts and spent a ton of time tuning the exhaust specifically for the application at every level from engine performance to off-road performance. I've been running their exhausts, including full Titanium systems on all my racer and performance street builds. Fitment and mounting points etc. are all perfect every time. In the tuning community they have a long reputation of the best sounding exhausts too, and that is very apparent with this system on the 392. It has quite a bark, and gives you those tingles on the way up the rpms. And of course the burbles on let-off around town for extra credit. You notice the performance impact right away if you also let it breathe on the front end via a filter box even. (I'm running the K&N fwiw). I'm running 37's, tazer, monster pedal, exhaust and intake, and I dust my wife's stock 392 XR every time, though it's not a 1:1 comparison b/c I have steel bumpers, heavy side steps, but also spare tire delete, so no clue where the weight differences end up)
 
I went and looked at it also, there are 2 options 1 with 1 without the actuators. It was about a $500 difference in price between the two. If you toggle between the two performance options is where it's at. I myself still like the AWE I think it tucks up higher?
just watched some great videos on the AWE, and I think it might tuck higher too, tough to say b/c I haven't found a vid that shows the profile of the jeep from the bottom edge of it along the whole run of the exhaust. As far as the tips go, the AWE's look to be tucked further 'forward' than the GTHaus, but hard to tell with my bumper vs. stock bumper. I have a buddy in So Cal with same system installed on his 392XR with stock bumpers, will ask him to take a pic from behind so we can gauge.

As far as the sound goes, my heavens do these two systems sound different. Sound is a matter of taste. To my ears the AWE sounds more 'nascar'..a lot of 'flapping'. Less refined than the gthaus, and less 'harmonics' for lack of better word. It sounds raw, which I love (I'm a racer, too).

will post the pics of my buddy's here shortly....
 
So I looked into the Gthaus exhaust designed for JL 392, I think you are the only person that I've heard installed this system. By looking at the pictures, it doesn't seem that we can reuse the active exhaust button since I don't see the vacuum actuators being used anywhere, is this true? They offer titanium tips which is unbeatable!
Pics of buddy's 392 XR w stock bumpers and gthaus system:
71073307576__D77154A4-FC15-41DE-BF26-EF386CFF5A44.webp
71073291968__348059C8-310B-4688-8A46-799C2E889001.webp
71073290739__2E9D3B04-69C8-4F09-B42A-E8E69B65476F.webp
 
just watched some great videos on the AWE, and I think it might tuck higher too, tough to say b/c I haven't found a vid that shows the profile of the jeep from the bottom edge of it along the whole run of the exhaust. As far as the tips go, the AWE's look to be tucked further 'forward' than the GTHaus, but hard to tell with my bumper vs. stock bumper. I have a buddy in So Cal with same system installed on his 392XR with stock bumpers, will ask him to take a pic from behind so we can gauge.

As far as the sound goes, my heavens do these two systems sound different. Sound is a matter of taste. To my ears the AWE sounds more 'nascar'..a lot of 'flapping'. Less refined than the gthaus, and less 'harmonics' for lack of better word. It sounds raw, which I love (I'm a racer, too).

will post the pics of my buddy's here shortly....
I have the AWE system and it appears to be tucked up much higher than the gthaus exhaust from these pictures. The AWE tips also sit much farther back too which helps a lot with departure angle.

IMG_4403.webp
 
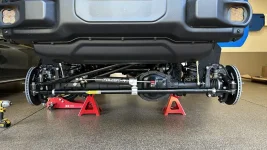
Saturday morning, I started in on the Clayton 2.5" Overland lift kit install. The kit included replacing all 8 control arms, front and rear track bars, coils, Falcon 3.3 Piggyback shocks, Falcon Nexus EF 2.2 steering stabilizer, and the CurrectLync Steering Upgrade by John Currie/Rock Jock (upgraded tie rod, drag link, and steering stabilizer relocation bracket).

In addition, I also added Artec rear lower control arm/shock mount skids, and a Rusty's front track bar reinforcement bracket.

Saturday I got the rear end completed, Sunday I completed the front end, and Monday (today) I installed the tie rod, drag link, and steering stabilizer.

Overall things went really smoothly. The entire kit went together with no real issues. I did have to elongate the control arm bolt hole on the Artec skid for the passenger side as it was off by about 1/16" inch. Nothing major.

For the Rusty's track bar brace, there is a tab of thing steel on the side of the coil perch that needed to be trimmed. You could also notch the Rusty's bracket, but it's much thicker steel - maybe even twice as thick.

The Falcon 3.3 shocks require some trimming of the rear inner fender trim pieces which can be done with a knife. I went back through with a Dremel and sanding wheel to clean them up nicely though. You also need to trim the front fender liners to accommodate the adjuster knob and the piggyback resi.

Lastly, on the passenger side, you need to pull the battery - there are two 10mm bolts through the bottom of the battery tray that attach the vacuum canister to the bottom of the battery tray. The front bolt needs to be moved inwards towards the engine about 1-1.25", which allows the vacuum canister to be repositioned just enough to clear the shock resi.

Teraflex provides templates that you cut out and mark so everything lines up perfectly.

I don't have any after pictures, but I'm loving the new stance. The kit eliminated almost all of the rake - and should do well when I add my winch this week. Here's a couple gratuitous shots from during the install.

Still to come are the parking brake cable brackets from Synergy and Rancho. Once they're both here, I'll decide which one I want to go with, but that will not take very long to wrap up the install.

Planning to get it in for an alignment on Friday. Two weeks from today we head out to SW CO to hit some of the trails in that area, including Black Bear Pass. It's gonna be amazing!

IMG_9403.jpeg


71053123526__92A61336-C183-4348-A5F1-DF7FC56F7514.jpeg
 

Attachments

  • IMG_9404.webp
    IMG_9404.webp
    214.1 KB · Views: 44
Does he have any body armor under there with it? Curious if it all works with the mufflers being ahead of the rear axle.
Nothing added for protection, no. The mufflers aren't the lowest point overall, clearance wise, but for large rocks etc, protection probably should be addressed ideally.
I agree on the departure angle, AWE for the win.
 
Saturday morning, I started in on the Clayton 2.5" Overland lift kit install. The kit included replacing all 8 control arms, front and rear track bars, coils, Falcon 3.3 Piggyback shocks, Falcon Nexus EF 2.2 steering stabilizer, and the CurrectLync Steering Upgrade by John Currie/Rock Jock (upgraded tie rod, drag link, and steering stabilizer relocation bracket).

In addition, I also added Artec rear lower control arm/shock mount skids, and a Rusty's front track bar reinforcement bracket.

Saturday I got the rear end completed, Sunday I completed the front end, and Monday (today) I installed the tie rod, drag link, and steering stabilizer.

Overall things went really smoothly. The entire kit went together with no real issues. I did have to elongate the control arm bolt hole on the Artec skid for the passenger side as it was off by about 1/16" inch. Nothing major.

For the Rusty's track bar brace, there is a tab of thing steel on the side of the coil perch that needed to be trimmed. You could also notch the Rusty's bracket, but it's much thicker steel - maybe even twice as thick.

The Falcon 3.3 shocks require some trimming of the rear inner fender trim pieces which can be done with a knife. I went back through with a Dremel and sanding wheel to clean them up nicely though. You also need to trim the front fender liners to accommodate the adjuster knob and the piggyback resi.

Lastly, on the passenger side, you need to pull the battery - there are two 10mm bolts through the bottom of the battery tray that attach the vacuum canister to the bottom of the battery tray. The front bolt needs to be moved inwards towards the engine about 1-1.25", which allows the vacuum canister to be repositioned just enough to clear the shock resi.

Teraflex provides templates that you cut out and mark so everything lines up perfectly.

I don't have any after pictures, but I'm loving the new stance. The kit eliminated almost all of the rake - and should do well when I add my winch this week. Here's a couple gratuitous shots from during the install.

Still to come are the parking brake cable brackets from Synergy and Rancho. Once they're both here, I'll decide which one I want to go with, but that will not take very long to wrap up the install.

Planning to get it in for an alignment on Friday. Two weeks from today we head out to SW CO to hit some of the trails in that area, including Black Bear Pass. It's gonna be amazing!

View attachment 23559

View attachment 23560
Awesome!
 
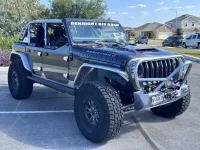
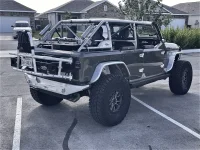
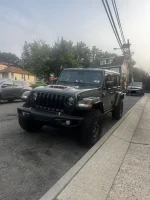
Been a busy weekend clearing boxes out of my garage!

Yesterday I got the Rock Slide Engineering step sliders and armor installed, and the light kit for them too. I have the door delete kit to add, and will probably do that when I install the Kraken/ARB compressor. I’m happy to report there were NO issues at all with the body bolts! 🙌

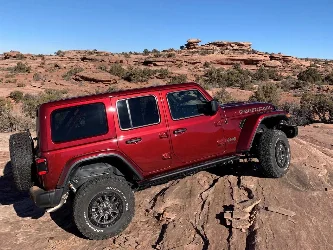
Today, I got the Teraflex Alpha hinge system and Alpha tire carrier installed. I set the tire carrier for my 37 Ridge Grappler / Method 703 backspacing combo, so I figured I might as well swap all the wheels too. The Teraflex parts are beefy and solid.

I’m loving this thing and can’t wait to get the Clayton suspension installed soon. And the winch…. and the lights, and the list goes on!

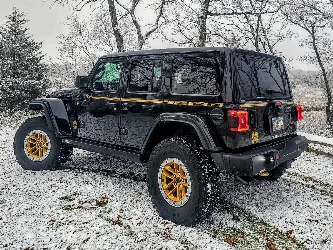
I’m really anxious for the replacement hood decals and vent decals from Pixel Decals to get here. Not sure when that will actually be though.


View attachment 22406

View attachment 22407

View attachment 22408
@redbeard719 nice rig!

Couple questions, is that the Mopar 3 hoop on the front bumper?

I'm looking at the RSE steps. Happy with them? Any concerns? What brand of mudflaps did you find that fit with them?

Thank you.
 
@redbeard719 nice rig!

Couple questions, is that the Mopar 3 hoop on the front bumper?

I'm looking at the RSE steps. Happy with them? Any concerns? What brand of mudflaps did you find that fit with them?

Thank you.
Thanks @RJP! I need to get some new pictures taken and posted.

I am running the Maximus-3 JL XLP hoop. I’m very pleased with the quality of it and recommend it. I like that it’s made in the US as well.


The RSE steps have been great. I added the door delete kit to allow them to operate with the doors removed. Also, the armor and LED kit are worth the expense. Once winter returns and it’s dark at 430pm in CO, the lighting will be very much appreciated.

The steps themselves have been flawless and are very stout. They’re great as they also provide some door protection against rolling shopping carts and flung open doors from cars parked next to the Jeep. Plus, they’re wide enough that you can stand on the body of the step to reach things on the roof.

As long as you don’t use an impact on the body bolts, you should be good for the install. I used a breaker bar and did 1/2 turn loose, followed by 1/4 turn tight. The back and forth really helps to break free the threadlocker that is factory applied.

As for the mudflaps, they are the Rokblokz XL flaps, with black logos. The logos are very subtle in black. XL fits perfectly with the XR options, and the rear flaps pretty much cover the entire tire width (37x12.5”).

If you specify the option for no cutouts when you order, they will work perfectly with the RSE steps. The nice thing about them is they are quickly removable for trail conditions. The fronts have three thumb screws, and the rears slide onto a supplied bracket that mounts to the frame, and then fasten with a single thumb screw. I really do like them and recommend the rears as they help to reduce rain spray onto the rear window. The rears can also be adjusted inwards/outwards to accommodate whatever backspacing your wheels have.

 
So sorry everyone... I installed SoundSkins front and rear (templates) this past weekend and totally spaced on taking pictures. It was hot as hades here in So. Cal around 92 and I wasn't in the mood.

The product itself is nice HOWEVER the templates themselves are not the greatest. Most of the hole cutouts don't line up. There aren't nearly enough relief cuts for overlapping areas (e.g. wheel wells and foot wells). The only template that actually lines up 100% is the driver foot well.

Im not sharing this to discourage anyone from purchasing their product HOWEVER I do have one piece of advice that will make the install much easier and that is to consider cutting all but the mid cab and foot well templates in half. This will make working with them much easier and "should" allow the cutouts to line up correctly.

In closing, so far it appears to have addressed the issue of the hot foot wells/hot feet during long drives which, fingers crossed, means offroading will be much more comfortable as well.
 
Thanks @RJP! I need to get some new pictures taken and posted.

I am running the Maximus-3 JL XLP hoop. I’m very pleased with the quality of it and recommend it. I like that it’s made in the US as well.


The RSE steps have been great. I added the door delete kit to allow them to operate with the doors removed. Also, the armor and LED kit are worth the expense. Once winter returns and it’s dark at 430pm in CO, the lighting will be very much appreciated.

The steps themselves have been flawless and are very stout. They’re great as they also provide some door protection against rolling shopping carts and flung open doors from cars parked next to the Jeep. Plus, they’re wide enough that you can stand on the body of the step to reach things on the roof.

As long as you don’t use an impact on the body bolts, you should be good for the install. I used a breaker bar and did 1/2 turn loose, followed by 1/4 turn tight. The back and forth really helps to break free the threadlocker that is factory applied.

As for the mudflaps, they are the Rokblokz XL flaps, with black logos. The logos are very subtle in black. XL fits perfectly with the XR options, and the rear flaps pretty much cover the entire tire width (37x12.5”).

If you specify the option for no cutouts when you order, they will work perfectly with the RSE steps. The nice thing about them is they are quickly removable for trail conditions. The fronts have three thumb screws, and the rears slide onto a supplied bracket that mounts to the frame, and then fasten with a single thumb screw. I really do like them and recommend the rears as they help to reduce rain spray onto the rear window. The rears can also be adjusted inwards/outwards to accommodate whatever backspacing your wheels have.

Any interference issues with the Maximus-3 JL XLP hoop and your forward camera?

It really looks nice.
 

Create an account or login to comment

Join now to leave a comment enjoy browsing the site ad-free!

Create account

Create an account on our community. It's easy!

Log in

Already have an account? Log in here.

Latest Discussions

Back
Top