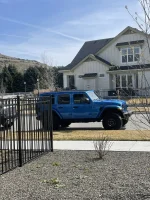
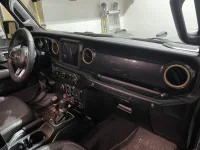
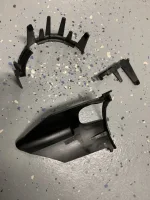
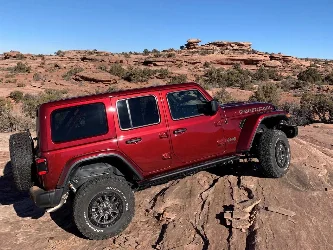
šŸ› ļø What did you do to your Jeep 392 today?

Why two hot and one ground?
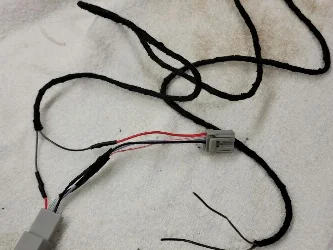
That’s how ARB builds it. At the compressor they run two 10 awg reds and two 10 awg black then about 1 foot from the plug near compressor they splice the Two 10 awg blacks into one 8 awg it might be a good idea to just run two 8 awg blacks as well back to the battery.instructions are not so great..
 
Why a ground and not just ground to chassis ?
Home runs are always best.. there is a chassis ground under back seat drive side near back door. But how would you calculate the chassis resistance?
I will home run it. maybe someone else can explain this better.
 
That’s how ARB builds it. At the compressor they run two 10 awg reds and two 10 awg black then about 1 foot from the plug near compressor they splice the Two 10 awg blacks into one 8 awg it might be a good idea to just run two 8 awg blacks as well back to the battery.instructions are not so great..
If you only run one ground you will be carrying the load of both hots on one ground. I would think you need to run two ground wires if you are wanting to run it all straight to the battery.
 
New to the forum, I’m in Arvada for the month if anyone wants to meet up. I got my oil changed this am and my icon rebound pros should be here today. Deciding if I want to use my 35s or get 37s. I have the mc game changer as well.
 

Attachments

  • AE8B0B0B-3DA0-4D59-AE36-EAC1B737D5A3.webp
    AE8B0B0B-3DA0-4D59-AE36-EAC1B737D5A3.webp
    314.8 KB · Views: 82
I forgot to ask if you don’t mind where did you pick up Your ignition wire and light wire, a.k.a. orange /red and white /blue wire . I think I’m just going to run 2 -8 awg reds and 1- 8 awg black . That way I can run through clutch grommet in fire wall and then in factory wire loom along driver side floor. I popped some of the trim and there seems to be enough room . I removed factory plug in fire wall replaced with thick rubber grommet I picked up at auto parts store . Your 4 awg is definitely better than 8 . But I don’t plan on running anything else off of that run just the compressor.
thanks again Earl 392 .
I only tied into the Jeep by using the aux switch 2 wire under the hood, next to the battery. I don’t remember what color wire it was I just picked one and it happened to be number 2. It was only a short 6 inch jump from there to my disconnect solenoid. Nothing ties into my lights.
 
If you only run one ground you will be carrying the load of both hots on one ground. I would think you need to run two ground wires if you are wanting to run it all straight to the battery.
Yes I concur I will run two reds and two black both #8
 
Dope! How did you do that?
I found these AC Vent Covers on Amazon: https://www.amazon.com/dp/B0BFCW881M?tag=jeep392-20

Keep in mind they do have Gold ones, but they were out of stock and I wasn't sure of the shade or how they would look so I bought the black ones and opted to paint them. Lastly based on the reviews most said the provided double sided tape was awful, so I also ordered 3M Automotive Tape: https://www.amazon.com/dp/B0B4MTX8RQ?tag=jeep392-20

I cut that in half length wise and put five, 1/2 inch strips around the back of the cover.

Saw from previous posts that Rust-Oleum 313142 (Champagne Bronze) was a good match with some of the other accents on the 392. Used that for a couple of coats. You could also add a couple coats of clear coat, I did not.

Hope that helps! Very easy mod and one that can easily be removed if I don't like it in the future.
 
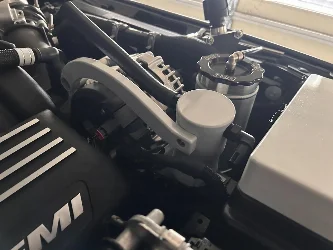
Finally I decided to snap off this oil filter guard. Oh man it makes inspection so much easier.
I looked at mine today as it was half on because of the larger filter I used but for some reason I left it there.
 
I looked at mine today as it was half on because of the larger filter I used but for some reason I left it there.
I had been fine with it after two oil changes with the Mo-899 and it doesn’t bother me. Until recently I noticed a very tiny drop at the edge of the oil filter once every few weeks. No sign of leaking, not even the upper section of the adaptor. Removing the guard does help observe the filter and housing connection. I’ll have to keep monitoring.
 
I'm very surprised crutchfield did not offer that solution.
[/QUOTE
My last few calls to Crutchfield, I've been very disappionted by the lack of knowledge the supposed "techs" actually had. Admittedly I usually have technical questions, but they seems to simply look up and read back the same info that is already in item description. Anything further and they just don't know. Didn't used to be that way.
 
Another invention completed. Made a underhood light. This articulates in different positions as need requires. I attached a 3/4" bar to the hood rod with wire clips. I ran 2 rows of light strips and wired to my switch panel by the driver's seat. With the winters short days I was frequently running out of juice on my portable work light.

20230203_181727.jpg

20230125_164447.jpg
20230222_154607.jpg
20230222_154630.jpg

20230222_154808.jpg
 
Last edited:
Another invention completed. Made a underhood light. This articulates in different positions as need requires. I attached a 3/4" bar to the hood rod with wire clips. I ran 2 rows of light strips and wired to my switch panel by the driver's seat. With the winters short days I was frequently running out of juice on my portable work light.

View attachment 18235
View attachment 18224View attachment 18226View attachment 18227
View attachment 18229
Totally brilliant! Love the hood prop light bar!

BTW, your coolant level seems a bit low.
 
Another invention completed. Made a underhood light. This articulates in different positions as need requires. I attached a 3/4" bar to the hood rod with wire clips. I ran 2 rows of light strips and wired to my switch panel by the driver's seat. With the winters short days I was frequently running out of juice on my portable work light.

View attachment 18235
View attachment 18224View attachment 18226View attachment 18227
View attachment 18229
Could you provide a pic of the switch panel that shows a little more?
 
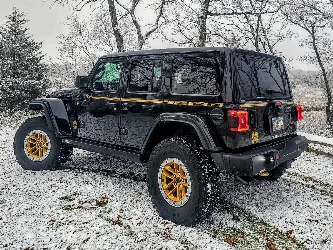
Picked the 392 up from the shop installing my lift, tires, driveshafts, steering, and tire carrier šŸ˜šŸ˜šŸ˜. Big shout out to Hardline Fabrication in Pottstown, PA for doing an awesome job the last few days working long hours to put this thing together for me. Waiting on a part to come in to mount the falcon steering stabilizer, which will happen next week. Even without the stabilizer the steering feels nice and tight. Picked it up at night so pics aren’t the best and the weather is expected to be bad the next few days. I’ll post better pics when weather clears up after I get the stabilizer installed next week.

View attachment 15949
View attachment 15950
View attachment 15951
View attachment 15952
View attachment 15953
View attachment 15954
View attachment 15955
i love the factory rims, really want to keep them with our 392. with the lift and 38's did you have to run any spacers. i have been told the factory rims will not work with a 3.5 inch lift. hope they are wrong. Jeep looks great
 
i love the factory rims, really want to keep them with our 392. with the lift and 38's did you have to run any spacers. i have been told the factory rims will not work with a 3.5 inch lift. hope they are wrong. Jeep looks great
Thanks! I love the look of the factory wheels too and prefer to keep them. I haven’t taken it off-road yet but have had no issues on road in terms of clearance. I think I may get a little rub on the trails at full flex, I’ll find out at the first crawl event of the season I’m registered for in April. That said the Clayton lift is a little taller than advertised so I don’t think it’ll be too bad. If it is I’ll buy some KMC bead locks with better offset and sell these and then should be fine.
 

Create an account or login to comment

Join now to leave a comment enjoy browsing the site ad-free!

Create account

Create an account on our community. It's easy!

Log in

Already have an account? Log in here.

Latest Discussions

Back
Top