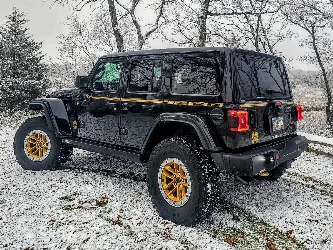
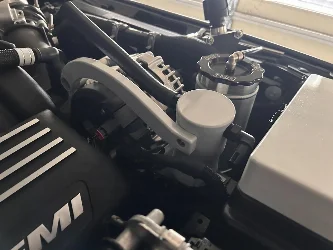
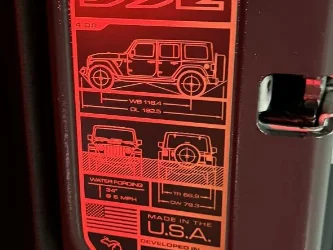
🛠️ What did you do to your Jeep 392 today?

Your jeep looks great! I did the same thing on my last JL. I had 3 separate sets of AAL lights yellowed and failed (from moisture) on me so I went to Quakes. They're overpriced in my opinion but both the quality and customer service are much higher.

View attachment 17970
I’ve spoken with AAL a couple of times and they were very helpful. I just think they are getting their lights from China or they are 3d printing, After the second person mentioned the yellowing they had to go.
 
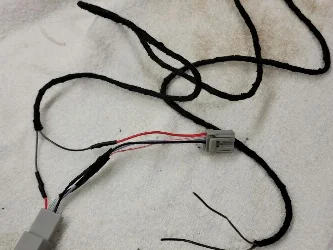
I changed my AAL high line fender lights and brackets to Quake. I love AAL products but the lights were starting to yellow even tho my Jeep lives in the garage and not daily driven. I bought the RBG lights because I was wanting to run my DRLs amber color. Quakes customer service was fantastic helping me out. A couple of wires need to be depinned in the harness on both sides to disable the DRLs from coming on during the the day and at night when the head lights are turned on. The amber looks good at night and even in low light but unfortunately not really bright enough to run as DRLs during the day. I’ll probably re pin the daytime white DRL and leave the amber at night for now.
I also finished up a complete overhaul of the sound system… JL Audio C3s front dash and knee panels. JLAudio M6s on roll bar with LEDs. 2 JLAudio stealth sub box’s in cargo. JLAudio VXi 1000w 5 channel amp. I also used their fuse and amp brackets. Very clean install. Will have to cut the fuse bracket some, the hydro glide is slightly hitting it. The Jeep hits like high school now.
Crutchfield says the C3 speakers won’t fit in the dash. Did you have to modify anything or did they drop in easily? Thanks.
 
Crutchfield says the C3 speakers won’t fit in the dash. Did you have to modify anything or did they drop in easily? Thanks.
Had to use adapters for all 6 speakers. I think we went with Metra.
 
Crutchfield says the C3 speakers won’t fit in the dash. Did you have to modify anything or did they drop in easily? Thanks.
Had to use adapters for all 6 speakers. I think we went with Metra.
I'm very surprised crutchfield did not offer that solution.
 
I painted the stone guards to match body color.
20230217_105409.webp
 
I didn’t even get my Jeep yet and ordered new running boards and new antenna. And I have a ring for the third brake light in the middle of the wheel. My last Jeep I had so many People stop me and tell me how much they love the third light
Links?
 
Finally got all the small odds and ends I needed to finish my air compressor.
A look at the bottom, I cut most of the ARB harness away and rewired the original switch and used a switch block instead of a single terminal for each contact. Keeps it cleaner and more secure, not sure why ARB wouldn’t use them to begin with. I used Tessa tape to wrap every inch of wire I could including the 4 gauge cables coming from the battery and also wrapped the power cables with split wire loom for protection under the Jeep.
View attachment 17044
A look at the control panel facing forward behind the seat. I added auxiliary posts so in the future I can add accessories or just use it as temporary power at anytime without needing to run more wires to the back. It is all supported by 4 gauge cable, good for 150 amps.
View attachment 17043
view with the seat up. It looks tight to reach the compressor switch but from outside the Jeep it feels very natural to reach in to flip the switch.
View attachment 17042
i added a removable molle panel to gain access to the fuses and air distribution block
View attachment 17040
Panel in place and fire extinguisher and med kit hooked down
View attachment 17041
Under the hood I added in a 500 amp power disconnect solenoid and a power distribution block. Both the winch and air compressor power is controlled by the solenoid, I still have one port for a spare. the solenoid is controlled by aux switch 2 set to ignition on.
View attachment 17045
I took the Jeep out and hooked the winch to a tree and pulled the Jeep with all four tires locked up for 15-20 seconds and had no loss of power and no terminal heat so I should safe.
Nice job. Any pointers on how you ran 4 awg back to compressor. Did you run it along driver side floor and go through fire wall near the brake booster? Any more details would be appreciated thanks.did you also run 4 awg ground ?
 
Changed the oil yesterday.

I pretty much hate everything about where they put that filter. the worst part is that some of the oil rained down on the steering stabilizer, getting into the plastic shield where you cannot just wipe it off.
 
Changed the oil yesterday.

I pretty much hate everything about where they put that filter. the worst part is that some of the oil rained down on the steering stabilizer, getting into the plastic shield where you cannot just wipe it off.
I use couple of towels to cover the components before unscrewing the oil filter. It’s been working very well and not messy at all.
 
Changed the oil yesterday.

I pretty much hate everything about where they put that filter. the worst part is that some of the oil rained down on the steering stabilizer, getting into the plastic shield where you cannot just wipe it off.

I removed the plastic spill funnel thing from the filter mount and use a gallon ziploc bag around the filter while unscrewing and removing it. Maybe spill a drop or two here or there, but otherwise clean removal.
 
Nice job. Any pointers on how you ran 4 awg back to compressor. Did you run it along driver side floor and go through fire wall near the brake booster? Any more details would be appreciated thanks.did you also run 4 awg ground ?
I did run 4 gauge wire for both positive and negative.
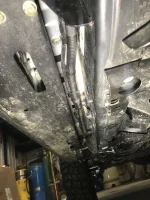
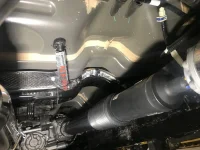
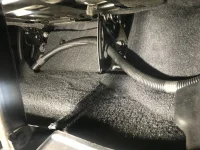
I ran it down behind the battery tray along the firewall, between the body and frame then use push lock zip ties to hold it to the bottom of the body. There is a long section of bracing that runs along the floor that is hollow and works excellent to use the push pin zip ties. From there I ran it over the top of the gas tank, up over the drive shaft using large 250 lb zip ties then to a plug in the floor that comes up under the rear seat. (does not seem to contact the seat when the seat is folded down). Poked it out from under the carpet to the drivers side trim panel. I made a small notch in the plastic trim and followed the curve where the inner fender forms into the side of the body just to the top of the inner fender where I poked it out through a small slice in the carpet under my compressor mount. I use Windy Nation 4 gauge wire, it has a nice rubbery coating, solid copper wire and says it’s made in the US. First time I have used it but it seems like really nice wire. I wrapped the entire length of wire in Tessa tape, wrapped that with plastic wire loom and where it comes close to the exhaust I wrapped it again with heat shielding. Sealed the floor plug with black rvt gasket sealer. When you open the rear door you can only see a few inches of the black wire loom coming out from under the seat. It can be run under the carpet but it seem to make the carpet not want to lay flat which I found to look worse.
346F3FFC-49BA-4FCA-AF29-05248AB37868.jpeg
6CEE0E54-CCB4-45BE-BBAF-3653C1575C1F.jpeg
E06D74CF-0B05-4D96-B037-427EB45CE21F.jpeg
I bought 25 feet of this wire but couldn’t find the link again for the 25 only 20 feet but this is the same brand I used.


Last edited:
I did run 4 gauge wire for both positive and negative.
I ran it down behind the battery tray along the firewall, between the body and frame then use push lock zip ties to hold it to the bottom of the body. There is a long section of bracing that runs along the floor that is hollow and works excellent to use the push pin zip ties. From there I ran it over the top of the gas tank, up over the drive shaft using large 250 lb zip ties then to a plug in the floor that comes up under the rear seat. (does not seem to contact the seat when the seat is folded down). Poked it out from under the carpet to the drivers side trim panel. I made a small notch in the plastic trim and followed the curve where the inner fender forms into the side of the body just to the top of the inner fender where I poked it out through a small slice in the carpet under my compressor mount. I use Windy Nation 4 gauge wire, it has a nice rubbery coating, solid copper wire and says it’s made in the US. First time I have used it but it seems like really nice wire. I wrapped the entire length of wire in Tessa tape, wrapped that with plastic wire loom and where it comes close to the exhaust I wrapped it again with heat shielding. Sealed the floor plug with black rvt gasket sealer. When you open the rear door you can only see a few inches of the black wire loom coming out from under the seat. It can be run under the carpet but it seem to make the carpet not want to lay flat which I found to look worse.
View attachment 18138
View attachment 18139
View attachment 18140
I bought 25 feet of this wire but couldn’t find the link again for the 25 only 20 feet but this is the same brand I used.


Thanks nice job
 
I did run 4 gauge wire for both positive and negative.
I ran it down behind the battery tray along the firewall, between the body and frame then use push lock zip ties to hold it to the bottom of the body. There is a long section of bracing that runs along the floor that is hollow and works excellent to use the push pin zip ties. From there I ran it over the top of the gas tank, up over the drive shaft using large 250 lb zip ties then to a plug in the floor that comes up under the rear seat. (does not seem to contact the seat when the seat is folded down). Poked it out from under the carpet to the drivers side trim panel. I made a small notch in the plastic trim and followed the curve where the inner fender forms into the side of the body just to the top of the inner fender where I poked it out through a small slice in the carpet under my compressor mount. I use Windy Nation 4 gauge wire, it has a nice rubbery coating, solid copper wire and says it’s made in the US. First time I have used it but it seems like really nice wire. I wrapped the entire length of wire in Tessa tape, wrapped that with plastic wire loom and where it comes close to the exhaust I wrapped it again with heat shielding. Sealed the floor plug with black rvt gasket sealer. When you open the rear door you can only see a few inches of the black wire loom coming out from under the seat. It can be run under the carpet but it seem to make the carpet not want to lay flat which I found to look worse.
View attachment 18138
View attachment 18139
View attachment 18140
I bought 25 feet of this wire but couldn’t find the link again for the 25 only 20 feet but this is the same brand I used.


I forgot to ask if you don’t mind where did you pick up Your ignition wire and light wire, a.k.a. orange /red and white /blue wire . I think I’m just going to run 2 -8 awg reds and 1- 8 awg black . That way I can run through clutch grommet in fire wall and then in factory wire loom along driver side floor. I popped some of the trim and there seems to be enough room . I removed factory plug in fire wall replaced with thick rubber grommet I picked up at auto parts store . Your 4 awg is definitely better than 8 . But I don’t plan on running anything else off of that run just the compressor.
thanks again Earl 392 .
 
I forgot to ask if you don’t mind where did you pick up Your ignition wire and light wire, a.k.a. orange /red and white /blue wire . I think I’m just going to run 2 -8 awg reds and 1- 8 awg black . That way I can run through clutch grommet in fire wall and then in factory wire loom along driver side floor. I popped some of the trim and there seems to be enough room . I removed factory plug in fire wall replaced with thick rubber grommet I picked up at auto parts store . Your 4 awg is definitely better than 8 . But I don’t plan on running anything else off of that run just the compressor.
thanks again Earl 392 .
Why two hot and one ground?
 
Why a ground and not just ground to chassis ?
 

Create an account or login to comment

Join now to leave a comment enjoy browsing the site ad-free!

Create account

Create an account on our community. It's easy!

Log in

Already have an account? Log in here.

Back
Top