🛠️ What did you do to your Jeep 392 today?

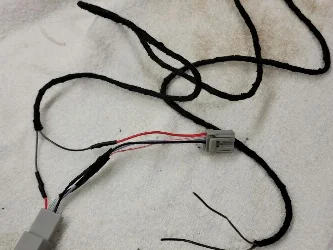
Added some Oracle reverse LEDs. Used their pnp harness. Pretty easy install though I removed the bumper.
View attachment 7433
I did the exact same this weekend, however a complete PITA. The left side light required a ton of filing and Drexel work to get it to fit in the hole. It was actually the inner lip of the steel bumper stamping that was the issue but no way to reshape that. I was worried about ruining the light with as much grinding that I had to do, but it is working fine. These things throw a light of light and look great.
 
Installed a set of inner fender liners from Reaper Offroad. Full disclosure - I had called the folks at Reaper Offroad a couple of months ago to inquire as to the fitment of their liners to my 392. Apparently, at the time, they had not had a test vehicle (392) to try these out on, so the excellent rep at RO asked me to try and fit a set on mine. The liners came in two boxes that were packed very well. All hardware was accounted for, and instructions to install were included. The instructions were designed around the non-392 JL's and JT's. I documented the install with pics and notes along the way, taking note of a couple of differences primarily with the front liners. The aluminum liners were powder-coated black.

Other than a cable (passenger-side) that had to be relocated and a tab on the driver-side liner having to be trimmed, the install went extremely well and easy. The one other thing I did after the install was to trim the old OEM liner and fit it under each fender (see pics). I did not like that the underside of the fenders were exposed after the liner install.

Before...driver-side(with OEM liner removed)

IMG_0269[1].JPG


After...driver-side (note the exposed underside of the fender)

IMG_0277[1].JPG


After-after...driver-side (trimmed OEM liner reinstalled to cover underside of fender)

IMG_0280[1].JPG


IMG_0281[1].JPG


Passenger-side front

IMG_0289[1].JPG


Rear

IMG_0298[1].JPG


IMG_0306[1].JPG


IMG_0307[1].JPG


Cheers!
 
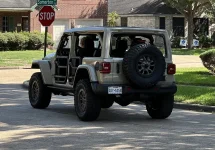
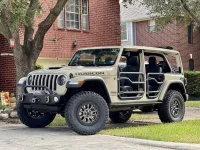
I did this around a week ago but just sharing. I have the one touch roof and love it except the back window it’s not nekid enough so i just remove the rear window, 4 bolts,one plug two struts to pop off wiper hose and defrost
 

Attachments

  • 8F0C7AF5-6AD0-4D71-A51B-7575A543FC14.webp
    8F0C7AF5-6AD0-4D71-A51B-7575A543FC14.webp
    238.2 KB · Views: 109
  • 522FB309-822D-45AC-BFEC-F202B8D95BCB.webp
    522FB309-822D-45AC-BFEC-F202B8D95BCB.webp
    390.9 KB · Views: 110
I did this around a week ago but just sharing. I have the one touch roof and love it except the back window it’s not nekid enough so i just remove the rear window, 4 bolts,one plug two struts to pop off wiper hose and defrost
I love that look. I think I like it better than all off. It still looks squared off and tough....but have the open air safari feel.
Cheers!
 
Headliner Install on the hard top. Put it back on for the winter.

 
Added Seat Jackers on the driver’s seat, now I finally have thigh support! I’m 6‘3”, and the lack of seat cushion angle adjustment was annoying, I felt like I was always sliding forward. Not any more!

Took 10 minutes and my legs already thank me.
 
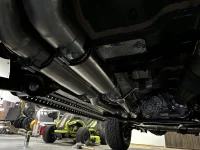
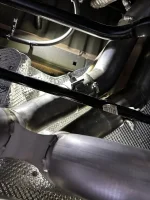
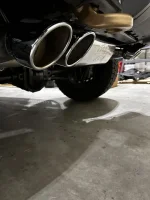
Borla Atak installed! Sounds better than my TRX did with the Atak. Sound clips don’t do it justice.
 

Attachments

  • 84D006A5-AB8E-433F-A255-8096DC3B2BFB.webp
    84D006A5-AB8E-433F-A255-8096DC3B2BFB.webp
    108.4 KB · Views: 88
  • D58C785F-1236-4A79-9D60-2084AE2B5946.webp
    D58C785F-1236-4A79-9D60-2084AE2B5946.webp
    124.2 KB · Views: 88
  • 78F47FFA-B2DB-4E1E-80BF-BFAD0C5C6831.webp
    78F47FFA-B2DB-4E1E-80BF-BFAD0C5C6831.webp
    73.2 KB · Views: 77
Added Seat Jackers on the driver’s seat, now I finally have thigh support! I’m 6‘3”, and the lack of seat cushion angle adjustment was annoying, I felt like I was always sliding forward. Not any more!

Took 10 minutes and my legs already thank me.
I've been thinking about them. $190 for 4 aluminum blocks is a little steep.
 
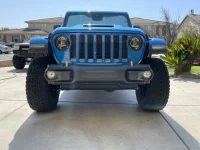
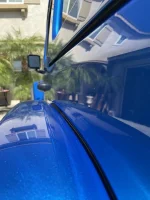
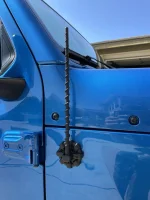
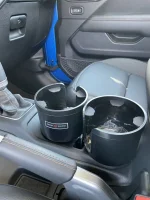
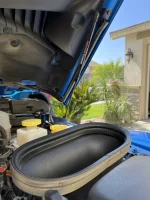
Installed: Redline hood struts, seven sparta cup holders, spiral antenna, Rugged Ridge Elite antenna base, Mopar locking gas cap, McGard wheel locks, and fender welting.

Removed: OEM front bumper caps

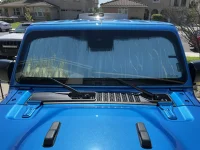
Started using: Weather Tech windshield sun shade.
 

Attachments

  • B6F02E5D-E2DE-4B3D-AAFD-2131B87E6776.webp
    B6F02E5D-E2DE-4B3D-AAFD-2131B87E6776.webp
    147.5 KB · Views: 170
  • 3CACE1A7-2B18-4128-B4F8-5F8D6E67C258.webp
    3CACE1A7-2B18-4128-B4F8-5F8D6E67C258.webp
    84.7 KB · Views: 176
  • 7C4CDDFA-8C20-46D0-9229-48F5A79E4174.webp
    7C4CDDFA-8C20-46D0-9229-48F5A79E4174.webp
    97.9 KB · Views: 183
  • 3A2D1EA1-1F3D-421E-BA7A-9ADBF7583140.webp
    3A2D1EA1-1F3D-421E-BA7A-9ADBF7583140.webp
    129.6 KB · Views: 157
  • 38BC2624-ABC4-432A-BF56-5041B9DE9D31.webp
    38BC2624-ABC4-432A-BF56-5041B9DE9D31.webp
    125.4 KB · Views: 154
  • 161AD495-6D80-4F61-AA93-EA03CC80BA91.webp
    161AD495-6D80-4F61-AA93-EA03CC80BA91.webp
    169.7 KB · Views: 151
Installed: Redline hood struts, seven sparta cup holders, spiral antenna, Rugged Ridge Elite antenna base, Mopar locking gas cap, McGard wheel locks, and fender welting.

Removed: OEM front bumper caps

Started using: Weather Tech windshield sun shade.

Where did you get the fender welting from? I didn't even know something like that was available.
 
Where did you get the fender welting from? I didn't even know something like that was available.
I was originally going to buy it from Amazon but they're not currently in stock so I spent a couple dollars more at....


Something to note... DO NOT use a pressure washer in that area after installation because it'll push the welting too far into the gap which will require reinstallation. Not that the process is difficult but rather a PIA to have to redo it.
 
I was originally going to buy it from Amazon but they're not currently in stock so I spent a couple dollars more at....


Something to note... DO NOT use a pressure washer in that area after installation because it'll push the welting too far into the gap which will require reinstallation. Not that the process is difficult but rather a PIA to have to redo it.
I think the forums created a run on that seal tubing. I got mine from Amazon for $18 but I have not put it on yet.
 

Create an account or login to comment

Join now to leave a comment enjoy browsing the site ad-free!

Create account

Create an account on our community. It's easy!

Log in

Already have an account? Log in here.

Latest Discussions

Back
Top