-
Featured
- #3,861
Navigation
Install the app
How to install the app on iOS
Follow along with the video below to see how to install our site as a web app on your home screen.
Note: This feature may not be available in some browsers.
More options
You are using an out of date browser. It may not display this or other websites correctly.
You should upgrade or use an alternative browser.
You should upgrade or use an alternative browser.
🛠️ What did you do to your Jeep 392 today?
- Thread starter willy
- Start date

Misanthropic_feed
Member
Good comment. Just updated my postGreat Addition! Love the pedals and grille inserts, how about posting some links to where your got them!

Misanthropic_feed
Member
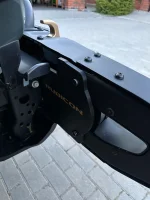
Added closeout panels to the front bumper:
Pretty good fit. Hope it will last.
They recommend to use longer (40 mm) bolts for installation, so I did. But it should be fine with original bolts.
Pretty good fit. Hope it will last.
They recommend to use longer (40 mm) bolts for installation, so I did. But it should be fine with original bolts.
Attachments

Wow those turned out great!Added closeout panels to the front bumper:
Pretty good fit. Hope it will last.
They recommend to use longer (40 mm) bolts for installation, so I did. But it should be fine with original bolts.


I got a set too. Mike is a great guy. He offers the covers for both end caps on and off.Added closeout panels to the front bumper:
Pretty good fit. Hope it will last.
They recommend to use longer (40 mm) bolts for installation, so I did. But it should be fine with original bolts.

Sound deadened the entire floor with Killmat and installed Armorlite flooring. This was a PITA because I had to remove the amps and compressor mounted under the front seats, but so worth it. I did this in my Gladiator previously and loved it. Only thing I'd do differently next time is use another brand with a black color as the silver of the Killmat can be seen around some of the seat mounts and stuff.
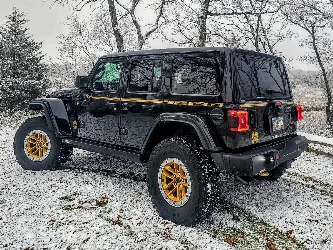
I also got my spare tire carrier adjusted for the new bumper installed last month and finally got my license plates installed. Used the Teraflex license plate relocation kit on the rear and a generic holder held on by metal zip ties up front.
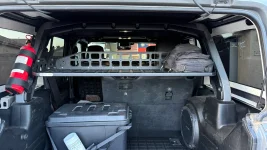
Also traded my other ARB compressor for a Bestop Sunrider and got that installed. That wasn't as easy as I'd hoped since I had to modify it a bit to get it to fit with the AAL overhead molle shelf.
I also got my spare tire carrier adjusted for the new bumper installed last month and finally got my license plates installed. Used the Teraflex license plate relocation kit on the rear and a generic holder held on by metal zip ties up front.
Also traded my other ARB compressor for a Bestop Sunrider and got that installed. That wasn't as easy as I'd hoped since I had to modify it a bit to get it to fit with the AAL overhead molle shelf.

Did you need to use seat jackers so your front passenger seat cleared the compressor electronics? Take a look to be sure that the cross bar under the seat isn't interfering with the compressor. As you likely know from your Gladdy, Armorlite is thicker than the carpet and lifts the compressor a bit, assuming it mounts similarly to the Kraken mounting system from Epic.Sound deadened the entire floor with Killmat and installed Armorlite flooring. This was a PITA because I had to remove the amps and compressor mounted under the front seats, but so worth it. I did this in my Gladiator previously and loved it. Only thing I'd do differently next time is use another brand with a black color as the silver of the Killmat can be seen around some of the seat mounts and stuff.
I also got my spare tire carrier adjusted for the new bumper installed last month and finally got my license plates installed. Used the Teraflex license plate relocation kit on the rear and a generic holder held on by metal zip ties up front.
Also traded my other ARB compressor for a Bestop Sunrider and got that installed. That wasn't as easy as I'd hoped since I had to modify it a bit to get it to fit with the AAL overhead molle shelf.
Last edited:
Misanthropic_feed
Member
I took both options. No plans to remove the end caps, but who knows. Great product IMHO.I got a set too. Mike is a great guy. He offers the covers for both end caps on and off.
No seat jackers, but I did reuse the bits AAL had used originally which lifts the seat by 1/2" roughly. It was tight at first but I was able to reroute the air line down and away from the seat rail.Did you need to use seat jackers so your front passenger seat cleared the compressor electronics? Take a look to be sure that the cross bar under the seat isn't interfering with the compressor. As you likely know from your Gladdy, Armorlite is thicker than the carpet and lifts the compressor a bit, assuming it mounts similarly to the Kraken mounting system from Epic.
The amp rack under the passenger seat on the other hand was even more a PITA as the Armorlite flooring is taller as you mentioned so the feet don't quite sit flat... but it's still above the vent and low enough to not interfere with seat sliding.
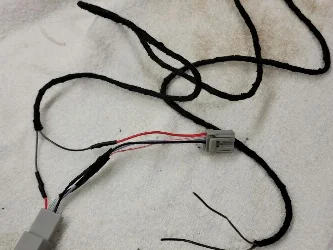
All those little details take time... and of course when you pull everything out you find other "projects" you need to do too... and one leads to another... like removing wiring that had been run through floor drains previously, which led to me to replacing that wire from the battery, so of course I added some KnuKonceptz battery terminals with oem posts, rewired all my lighting and installed a Diode Dynamics D-Switch.
Now I just need to find the right mount for the switch panel and figure out why my app isn't finding the D-Switch on any devices I try. I'm planning to stop by the DiodeDynamics headquarters on Friday for a tour so I'll see what they suggest.

The joys of doing it yourself! You know it's done the way you want, and you discover what's been hiding. Good on you for taking the time to do things right. I broke about 4 plastic clips through the process, but hey, it was ME that broke them, not someone else. So it's still better.No seat jackers, but I did reuse the bits AAL had used originally which lifts the seat by 1/2" roughly. It was tight at first but I was able to reroute the air line down and away from the seat rail.
The amp rack under the passenger seat on the other hand was even more a PITA as the Armorlite flooring is taller as you mentioned so the feet don't quite sit flat... but it's still above the vent and low enough to not interfere with seat sliding.
All those little details take time... and of course when you pull everything out you find other "projects" you need to do too... and one leads to another... like removing wiring that had been run through floor drains previously, which led to me to replacing that wire from the battery, so of course I added some KnuKonceptz battery terminals with oem posts, rewired all my lighting and installed a Diode Dynamics D-Switch.
Now I just need to find the right mount for the switch panel and figure out why my app isn't finding the D-Switch on any devices I try. I'm planning to stop by the DiodeDynamics headquarters on Friday for a tour so I'll see what they suggest.

RickinAZ
Well-known member
Regarding breaking clips: At least the DIYer actually knows that they were broken. I've never had a third party tell me that a plastic clip was broken and pieces are lost somewhere in the dash.The joys of doing it yourself! You know it's done the way you want, and you discover what's been hiding. Good on you for taking the time to do things right. I broke about 4 plastic clips through the process, but hey, it was ME that broke them, not someone else. So it's still better.
3TV
Well-known member
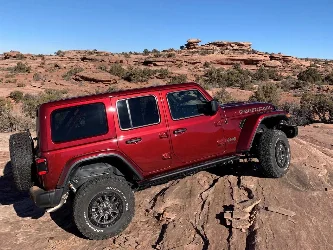
After 17 days and 17 different trails in a 3-week time period my 392 was filthy. And I mean horribly filthy with more dirt, dust, and grime inside and out than it has ever had. It looked worse than a farm truck that hasn't been washed in years. So, I treated it to a day at the spa for an interior and exterior detail. The inside has been cleaned with leather conditioner applied and the exterior has been cleaned with a sealant applied. All is well again.


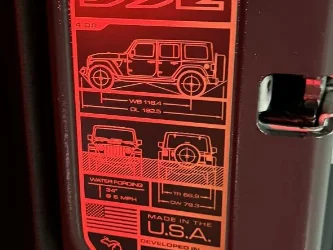
Absolutely gorgeous. Love the dash sticker.After 17 days and 17 different trails in a 3-week time period my 392 was filthy. And I mean horribly filthy with more dirt, dust, and grime inside and out than it has ever had. It looked worse than a farm truck that hasn't been washed in years. So, I treated it to a day at the spa for an interior and exterior detail. The inside has been cleaned with leather conditioner applied and the exterior has been cleaned with a sealant applied. All is well again.
View attachment 54751
View attachment 54753View attachment 54754
Capsfan
Well-known member
No pics yet but just got my MOAB. Here's what's happening in the next 2 weeks:
Full satin ppf
Tint
38x13.5 Trail Grapplers
Teraflex 3.5" lift and other suspension upgrades
Rickslides
OBD2 programmer
Ill post up when done
Full satin ppf
Tint
38x13.5 Trail Grapplers
Teraflex 3.5" lift and other suspension upgrades
Rickslides
OBD2 programmer
Ill post up when done
Last edited:
3TV
Well-known member
Can't wait to see the satin PPF. PPF on my 2022 392 was the best thing I've ever done to a vehicle. This is the only off-road vehicle I have owned that has not accumulated a ton of brush scratches. It is 4 years old and still looks like new. Even if it gets brush scratches, I just park it in the sun for a day and the scratches in the PPF auto heal.No pics yet but just got my MOAB. Here's what's happening in the next 2 weeks:
Full satin ppf
Tint
38x13.5 Trail Grapplers
Trailer 3.5" lift and other suspension upgrades
Rickslides
OBD2 programmer
Ill post up when done
You'll have to explain a "Trailer lift". I googled it and couldn't find anything related to Jeeps.
Capsfan
Well-known member
My last one also had satinCan't wait to see the satin PPF. PPF on my 2022 392 was the best thing I've ever done to a vehicle. This is the only off-road vehicle I have owned that has not accumulated a ton of brush scratches. It is 4 years old and still looks like new. Even if it gets brush scratches, I just park it in the sun for a day and the scratches in the PPF auto heal.
You'll have to explain a "Trailer lift". I googled it and couldn't find anything related to Jeeps.
Attachments
RickinAZ
Well-known member
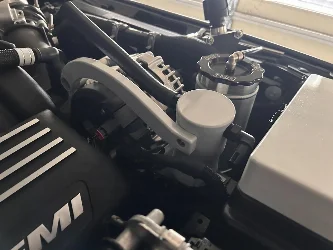
I installed an emblem to compliment my plate frame.

RickinAZ
Well-known member
I only paid $46, via this link, five days ago. Since the price went up dramatically, I'd shop around using the part number listed.@RickinAZ - link to emblem, looks good!
Amazon.com: New Oem Mopar 15-16 Dodge Challenger Gray Black Hemi Fender Emblem Badge Nameplate 68292587AB : Automotive
Amazon.com: New Oem Mopar 15-16 Dodge Challenger Gray Black Hemi Fender Emblem Badge Nameplate 68292587AB : Automotive
www.amazon.com
I also considered this one, but wanted something more subtle than the red: