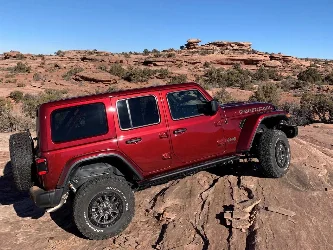
šŸ› ļø What did you do to your Jeep 392 today?

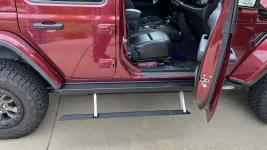
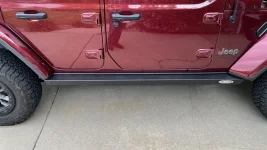
Finally got around to installing the RSE steps. Did it solo in the driveway. Took my time with the body bolts, hit them with torch for 30 seconds, applied a little pressure with the breaker bar, hit it with the torch for another 20-30 seconds, repeat until it gets easier, while turning the bolts back in a bit every now and then. Also gloves are a must! I also had to drill out the front mounting hole as it was 1/8ā€ too high. Might have been able to force it with some extra hands, but was easy enough to drill it out and throw a coat of paint on.

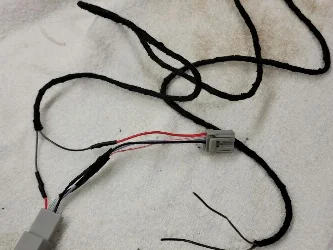
Once it was all bolted on and wired up, put the fuse in… and nothing! I went through and checked all connections, tested voltage on the harness, hooked the motors up to an external 12 volt power source, was at a loss. RSE got back to me, said to disconnect all door sensors, insert the fuse, then connect the doors one by one. Boom! Everything works now! Just need to add the skid plates now.
 

Attachments

  • IMG_5010.webp
    IMG_5010.webp
    162.6 KB · Views: 67
  • IMG_5009.webp
    IMG_5009.webp
    165.2 KB · Views: 58
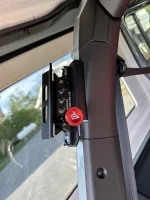
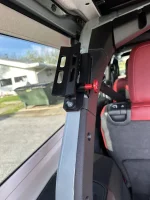
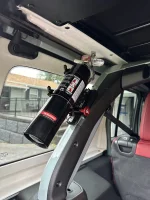
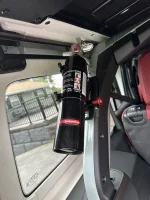
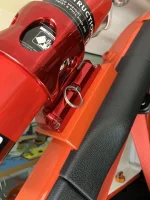
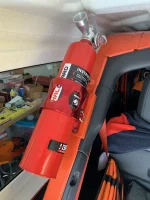
I installed the adventure lab fire extinguisher bracket but didn’t like the look with the missing trim panel. So I got the trusty moto tool tape and some files. With lots of
IMG_3311.webp
patience and trying and retrying the fitmit it came out pretty good I think. Took way more time than expected
 

Attachments

  • IMG_3312.webp
    IMG_3312.webp
    132.3 KB · Views: 65
  • IMG_3313.webp
    IMG_3313.webp
    100.9 KB · Views: 67
  • IMG_3346.webp
    IMG_3346.webp
    125.4 KB · Views: 68
  • IMG_3345.webp
    IMG_3345.webp
    122.3 KB · Views: 66
I installed the adventure lab fire extinguisher bracket but didn’t like the look with the missing trim panel. So I got the trusty moto tool tape and some files. With lots of View attachment 35462patience and trying and retrying the fitmit it came out pretty good I think. Took way more time than expected
Nice
 
I installed the adventure lab fire extinguisher bracket but didn’t like the look with the missing trim panel. So I got the trusty moto tool tape and some files. With lots of View attachment 35462patience and trying and retrying the fitmit it came out pretty good I think. Took way more time than expected
I like that. I wonder if the mount will work along with their cargo shelf. I have mine up pretty high so it may not clear.
 
Not today but this week anyway.

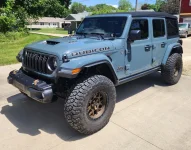
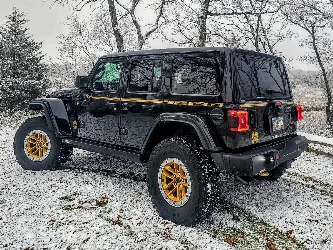
Installed soft top... Added Weld Clinch wheels and 35 Toyo RTs .. installed my Rigid cubes.. Installed Borla Atak.. Tinted front windows.. stealth ppf on radio screen.. added hotheads sunshade.. and removed the rear tow hook and bumper end caps.
 

Attachments

  • 20240522_122732.webp
    20240522_122732.webp
    285.1 KB · Views: 96
I installed the adventure lab fire extinguisher bracket but didn’t like the look with the missing trim panel. So I got the trusty moto tool tape and some files. With lots of View attachment 35462patience and trying and retrying the fitmit it came out pretty good I think. Took way more time than expected

Nice clean mount!

I did the same thing. The part manufactured by AAL (ie the very basic part that interfaces with Jeep) is great.

The part bolted to it - the extinguisher base and bracket - is not great . I’m pretty sure that AAL stamps their name on this, but does not manufacture. It is identical to several off brand / Chinese made versions for sale all over Amazon etc. (tell me I’m wrong if you have better information) it is poorly made with garbage tolerances and rattles me to death. Have stuck some cut-up pool noodle foam down in there, and it has helped some.

Very interested to hear if yours is quiet.
 
Nice clean mount!

I did the same thing. The part manufactured by AAL (ie the very basic part that interfaces with Jeep) is great.

The part bolted to it - the extinguisher base and bracket - is not great . I’m pretty sure that AAL stamps their name on this, but does not manufacture. It is identical to several off brand / Chinese made versions for sale all over Amazon etc. (tell me I’m wrong if you have better information) it is poorly made with garbage tolerances and rattles me to death. Have stuck some cut-up pool noodle foam down in there, and it has helped some.

Very interested to hear if yours is quiet.
Well that sucks
 
Nice clean mount!

I did the same thing. The part manufactured by AAL (ie the very basic part that interfaces with Jeep) is great.

The part bolted to it - the extinguisher base and bracket - is not great . I’m pretty sure that AAL stamps their name on this, but does not manufacture. It is identical to several off brand / Chinese made versions for sale all over Amazon etc. (tell me I’m wrong if you have better information) it is poorly made with garbage tolerances and rattles me to death. Have stuck some cut-up pool noodle foam down in there, and it has helped some.

Very interested to hear if yours is quiet.
Nope It rattles pretty bad I'm going to take a look at it and see what I can do about that.
 
Not today but this week anyway.

Installed soft top... Added Weld Clinch wheels and 35 Toyo RTs .. installed my Rigid cubes.. Installed Borla Atak.. Tinted front windows.. stealth ppf on radio screen.. added hotheads sunshade.. and removed the rear tow hook and bumper end caps.
Looks really good! Don't see those Cinch wheels often on the Jeeps!
 
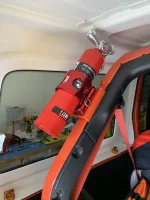
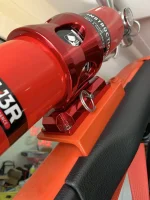
Really nice color match. Is that the bracket from H3R that mounts to the two screw holes behind the plastic cover?
No that's a piece of angle aluminum I cut to size and drill holes for the bracket mount and to mount to the roll bar traded holes.
 
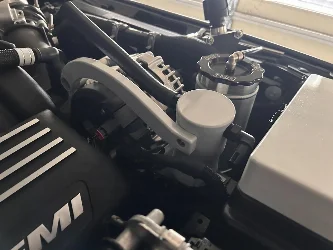
Swapped the J&L catch can for an ABD. More aesthetically pleasing imo. Wish it was out when I was looking the first time.

IMG_6550.webp
 
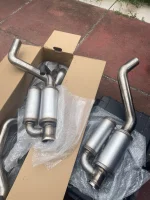
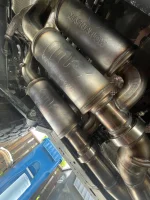
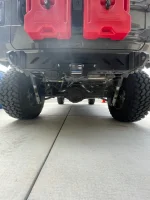
Installed my Magnaflow Rock Crawler Exhaust, besides picking up a huge amount of ground clearance/departure angle it sounds better than the factory exhaust in my opinion.
 

Attachments

  • IMG_1637.webp
    IMG_1637.webp
    206.5 KB · Views: 55
  • IMG_1643.webp
    IMG_1643.webp
    179.8 KB · Views: 62
  • IMG_1652.webp
    IMG_1652.webp
    139.1 KB · Views: 54
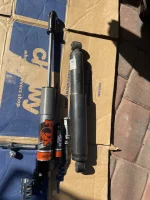
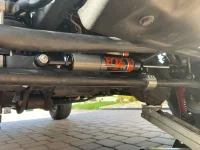
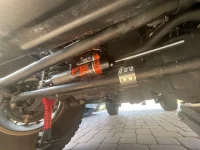
Finally upgraded from the oem Stabilizer to the ATS one we sell along with the Synergy Relocation Bracket and Bolt on my wife’s 392.


Attachments

  • IMG_5372.webp
    IMG_5372.webp
    265.8 KB · Views: 56
  • IMG_5375.webp
    IMG_5375.webp
    100.2 KB · Views: 62
  • IMG_5373.webp
    IMG_5373.webp
    141 KB · Views: 59
Finally upgraded from the oem Stabilizer to the ATS one we sell along with the Synergy Relocation Bracket and Bolt on my wife’s 392.

Good timing, I’ve been looking at the steering components. What’s the driving impression with Fox ATS? Significantly better than stock?
 
Good timing, I’ve been looking at the steering components. What’s the driving impression with Fox ATS? Significantly better than stock?
With 24 clicks of adjustments, so much flexibility from soft to stiff. I’m at 12 clicks on it now and it’s smooth, but letting her adjust it as needed.

The factory one was done 26,500 miles and was making highway driving quite interesting.
 

Create an account or login to comment

Join now to leave a comment enjoy browsing the site ad-free!

Create account

Create an account on our community. It's easy!

Log in

Already have an account? Log in here.

Back
Top