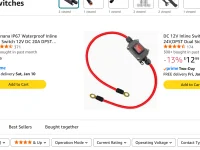
Thanks for the pic.I found this on Amazon for the positive side . Yours is a complete disconnect on negative side.well it's not a switch but a knob, the wiring on right side is not his work
Navigation
Install the app
How to install the app on iOS
Follow along with the video below to see how to install our site as a web app on your home screen.
Note: This feature may not be available in some browsers.
More options
You are using an out of date browser. It may not display this or other websites correctly.
You should upgrade or use an alternative browser.
You should upgrade or use an alternative browser.
Who makes the best electric powersteps for the 24/5 392?
- Thread starter OldVetteGuy
- Start date


- Jul 3, 2025
- 578
- 852
- Current Rides
- 2025 Rubicon 392, 2008 Hummer H2, 2018 JLUR Retired, 2015 JK Sahara 2dr retired,
- Thread starter
- #42
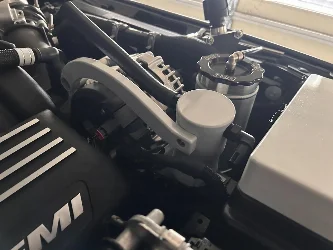
Nice, this would also be great to hide under the hood and connect to the fuel pump power as an extra layer of theft protection. Say if you need to say leave your Jeep at long term parking such as an Airport or what not.Thanks for the pic.I found this on Amazon for the positive side . Yours is a complete disconnect on negative side.View attachment 52094
We will see how the quality is but that’s a possibility especially with hood locks.Nice, this would also be great to hide under the hood and connect to the fuel pump power as an extra layer of theft protection. Say if you need to say leave your Jeep at long term parking such as an Airport or what not.
About the airport
 I don’t think security is so great. At least not in Tucson AZ.
Steps ordered on the 6th delivery on the ninth . All body bolts removed filled ,wire wheeled cleaned and anti size applied. Only the front most passenger side may have had room to fit the step bracket . Filed anyways and treated the same as others.Nice, this would also be great to hide under the hood and connect to the fuel pump power as an extra layer of theft protection. Say if you need to say leave your Jeep at long term parking such as an Airport or what not.

OffRoadMedic
Well-known member
Took my driver's side off last week, the actuator/control arm that connects the motor to the actual step was bent and the E-clip holding it in place was missing so the arm fell off the pin and my step was just limp and hanging.Ordered it today
Did any body have difficulty with body mount bolts . Striping or seizing

Fairly easy to do, took me a few hours as I had bought my Jeep used with them already installed. Hardest part for me was accessing the side skirt bolts, very small hole, highly recommend a ratcheting wrench or else you'll be doing 1/4 turns at a time with an open head wrench lol.
I was able to hammer the actuator arm flat with a hammer and connected it back onto either pin and secured with a new set of E-clips.
Total cost $3 from Home depot and 4 hours of labor taking my time and cleaning during the process. Sure beats buying a whole new motor for $135 +, Still have a little play when I step onto the step, but I'll survive.
Prepping everything now ups is on the way. Don’t care how long it takes, putting split sleeving on all wiringTook my driver's side off last week, the actuator/control arm that connects the motor to the actual step was bent and the E-clip holding it in place was missing so the arm fell off the pin and my step was just limp and hanging.
Fairly easy to do, took me a few hours as I had bought my Jeep used with them already installed. Hardest part for me was accessing the side skirt bolts, very small hole, highly recommend a ratcheting wrench or else you'll be doing 1/4 turns at a time with an open head wrench lol.
I was able to hammer the actuator arm flat with a hammer and connected it back onto either pin and secured with a new set of E-clips.
Total cost $3 from Home depot and 4 hours of labor taking my time and cleaning during the process. Sure beats buying a whole new motor for $135 +, Still have a little play when I step onto the step, but I'll survive.
View attachment 52097

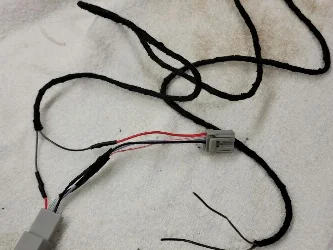
The beauty of doing your own work. Knowing care and quality is where you want it.Prepping everything now ups is on the way. Don’t care how long it takes, putting split sleeving on all wiring View attachment 52124

Jerzey Girl
Well-known member
- Jan 23, 2024
- 143
- 241
- Current Rides
- 2022 Jeep JL 392 2020 Jeep Rubi 37" 2.5 RK 2017 Jeep JK 33" 2.5 RK 2011 Camaro
Thanks for the pic.I found this on Amazon for the positive side . Yours is a complete disconnect on negative side.View attachment 52094my other Jeep JL Rubi - a shop did a positive battery disconnect. the installed dealer apps like satellite radio, offroad pages ect just disappeared, and no backup camara. with the 392 and disconnecting from negative side the Jeep has no issues with apps or camera. I will check out how much the battery lost by disconnecting only by negative.
Made some changesThe beauty of doing your own work. Knowing care and quality is where you want it.
Removed the 1/4 inch drive rivets ,replaced with 1/4 28 button head grade 8+ one washer on the back with grade 8 nut. A little tight to reach front and rear but doable. Also added 5 m10 grade 10.9 button head bolts with pinch nuts to the 5 slotted holes on bottom securing skid to step . Could have used 7/16 but some slots were tight and didn’t want to beat them in . Much more secure now.

2024White392
Well-known member
Pictures? Going to install end of next month and want to do the same, seems far stronger than rivets which could pull out.Made some changes
Removed the 1/4 inch drive rivets ,replaced with 1/4 28 button head grade 8+ one washer on the back with grade 8 nut. A little tight to reach front and rear but doable. Also added 5 m10 grade 10.9 button head bolts with pinch nuts to the 5 slotted holes on bottom securing skid to step . Could have used 7/16 but some slots were tight and didn’t want to beat them in . Much more secure now.
Drive rivets 350- 400 pounds of clamping forcePictures? Going to install end of next month and want to do the same, seems far stronger than rivets which could pull out.
1/4 28 ,3200+ pounds of clamping force .
The 5 M10 10.9 bolts I added on the bottom of each skid 5000 pounds clamping force . 7/16 even stronger but tight on some slots 1 mm difference. I will get you some pics . I had to paint all bolts as zink coated button head don’t seem to exist.
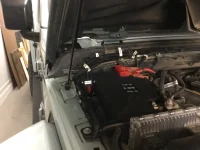
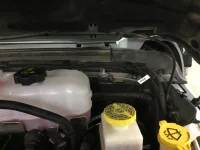
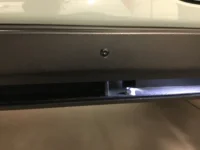
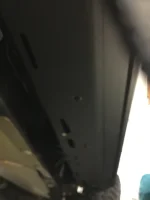
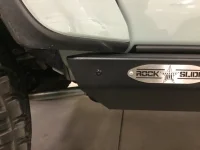
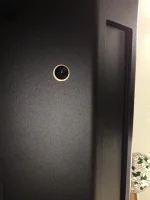
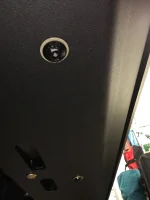
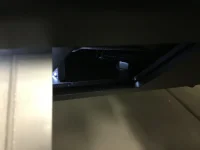
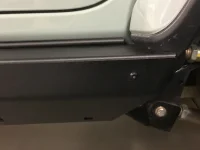
Here are some pictures.side note the bump stop rail that you stick on first per directions at 1 3/4 inch below door sill. I think is a bit to high . Should have been 1/4 inch lower in my opinion . 2023 Jlu. I would set the step in place first and take a measurement. Mine looks like others I have seen .another note I did use the switch in post 41 .pictures to follow.Pictures? Going to install end of next month and want to do the same, seems far stronger than rivets which could pull out.
Pictures? Going to install end of next month and want to do the same, seems far stronger than rivets which could pull out.
Attachments
-
 IMG_1887.webp88.4 KB · Views: 23
 -
 IMG_1886.webp80.5 KB · Views: 24
 -
 IMG_1885.webp39.1 KB · Views: 28
 -
 IMG_1883.webp25.6 KB · Views: 26
 -
 IMG_1889.webp58.3 KB · Views: 25
 -
 IMG_1890.webp108.4 KB · Views: 26
 -
 IMG_1891.webp59.9 KB · Views: 25
 -
 IMG_1893.webp27.7 KB · Views: 26
 -
 IMG_1866.webp69 KB · Views: 23
 -
 IMG_1882.webp63.6 KB · Views: 23
Another note wire harness in back runs over cross member from one side of Jeep to the other I removed the two rear heat shield bolts 10 mm slide harness up on top of cross member to keep wiring away from exhaust replaced bolts. This not in the instructions (392) . Work those 6 body bolts back and forth until there is no binding they are heavy covered with lock tight . There is a spring clip washer under the nut that retains the bolt .once bolt is loose pry the bolt downward it will pop out . Only one of the six on my Jeep unthreaded from the retainer washer . This is the most tedious part in my opinion of the project.Pictures? Going to install end of next month and want to do the same, seems far stronger than rivets which could pull out.
The last thing you want to do is strip one out .the two most front bolts had the most red lock tight.

CAMEL2R
Army Veteran
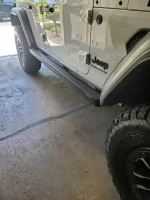
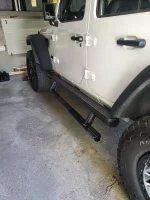
I bought my 392 with 6000K on the clock and it came with AMP's installed. They are nice (wife loves them) and I tend to shy away from big rocks so I don't rip them off. My buddy has the RSE and they look and perform great, but he has replaced one of the motors twice now. The AMP's aren't much better in that regard, as there's a pin on the passenger side motor mechanism that keeps backing out. You'll know because it screams bloody murder...loudly. I have to drop the motor and push it back in and away we go. Next time I'll find a way to block the pin for good. IMHO, both are good, it comes down to the type of terrain you run on and your budget. If my AMP's ever do get trashed, I'll switch to RSE with skids for sure and paint them Sarge green.

It’s large but working well for the steps not that’s needed but for long term parkingNice, this would also be great to hide under the hood and connect to the fuel pump power as an extra layer of theft protection. Say if you need to say leave your Jeep at long term parking such as an Airport or what not.

OffRoadMedic
Well-known member
x2 on this. One of my favorite mods on mine.Rock Slide Engineering. Buy once, cry once.
Also, it’s worth adding their doors off kit so you can activate the steps with the doors removed, as well as the LED lighting kit.
And, add their Armor kit as well, and you will have not only electric steps that work great, but also solid rock sliders too.
No need to be swapping sliders/steps back and forth!
Allow me to save you a lot of $$$, buy 4 small magnets off amazon and put them on the sensor when you're driving. Then when you want to deploy them, remove the magnet, get in, and put the magnet back on. Worked flawlessly with my Mopar half doors.
- Jul 3, 2025
- 578
- 852
- Current Rides
- 2025 Rubicon 392, 2008 Hummer H2, 2018 JLUR Retired, 2015 JK Sahara 2dr retired,
- Thread starter
- #58
My comment after having the RSE for about 1 year.
After seeing the competition an how well the RSE steps seems to hold up in the real world if you need extendable steps this is the only real game in town. The Armor kit finishes off the deal giving the owner about the best protection you can have with the convenience of a really functional drop down step that's actually structurally stronger then the Jeep its mounted on!
True, they are not cheap and there are many others out there that are less then half the cost but will also provide half the protection. Some times you actually get what you pay for.
And though my current 392 will never see the Moab or Rubicon trail it's nice to know it could and survive! Buy once, Buy right and move onto the next accessory knowing you won't have to screw with it again! That always leaves a smile on my face. Would I buy it again? you bet!
After seeing the competition an how well the RSE steps seems to hold up in the real world if you need extendable steps this is the only real game in town. The Armor kit finishes off the deal giving the owner about the best protection you can have with the convenience of a really functional drop down step that's actually structurally stronger then the Jeep its mounted on!
True, they are not cheap and there are many others out there that are less then half the cost but will also provide half the protection. Some times you actually get what you pay for.
And though my current 392 will never see the Moab or Rubicon trail it's nice to know it could and survive! Buy once, Buy right and move onto the next accessory knowing you won't have to screw with it again! That always leaves a smile on my face. Would I buy it again? you bet!
Last edited:
buy once, cry onceMy comment after having the RSE for about 1 year.
After seeing the competition an how well the RSE steps seems to hold up in the real world if you need extendable steps this is the only real game in town. The Armor kit finishes of the deal giving the owner about the best protection you can have with the convenience of a really functional drop down step that's actually structurally stronger then the Jeep its mounted on!
True, they are not cheap and there are many others out there that are less then half the cost but will also provide half the protection. Some times you actually get what you pay for.
And though my current 392 will never see the Moab or Rubicon trail it's nice to know it could and survive! Buy once, Buy right and move onto the next accessory knowing you won't have to screw with it again! That always leaves a smile on my face. Would I buy it again? you bet!


Jeep 392 Forum Favs 👍
View All ›