MC skids

I had the same issue with a MC front diff skid on my last Jeep. MC told me the same reason they told you. My shop was able to make their skid work, but it did require re-drilling one of the mounting holes in the MC skid and using a few spacer washers. That problem has been around for at least three years. I don't see why they haven't corrected for it yet. On this Jeep I used Next Venture diff skids, which I thought were designed better and fit with no problems.
could you possibly send me a couple clear photos of what was done on yours?

my shop is going to tackle it next Thursday and spoke about flat stock being added to make up the gap from where it is supposed to fit a fastener throguh..... I hear them say there is supposed to be something drilled but they did not tell me where

Just looked from their photos one of the tabs just hangs out in the clear with nothing behind it.
 
I don't own that Jeep anymore. From memory they had to redrill the hole in the skidplate and a matching hole in the cast webbing of the differential for a bolt to go through to secure the inboard rear skid plate mount. It also needed a few washers between the bottom of the front differential cover and the lower front portion of the differential skid to help it line up better. I did manage to lightly bend that front differential skid, which I thought was due to the compromised mounting not being as strong.
 
Got everything finally finished today

The rear of the front diff skid on the DS was installed with three 9/16 spacers to fill the gap and it looks to be secure.

Now to get out and scratch it all up feeling secure about its protection.
20240425_121701.webp

20240425_121632.webp

20240425_121657.webp


20240425_121642.webp
 
I am waiting to receive the magna flow rock crawler exhaust to put on my 392. Looking at the way the resonator cans and mufflers are, I don't think the metal cloak skid will fit with that exhaust. I think one of the mounting bolts is blocked by the resonator can. If anybody knows otherwise I would appreciate the heads up and I will order one.
I ordered the whole set minus the muffler skid since I have the MF Rock Crawler exhaust.

The resonator skid doesn't fit properly over the Rock Crawler mini mufflers/resonators. The people at Metalcloak are looking into it. If I don't hear back in a few weeks I'll try to modify it a bit myself before our Jeep Trip out west mid July.
I was able to adapt the metal cloak resonator skid to my rock, crawler exhaust system fairly easily. I needed to make the one bracket shown in the picture below on the yellow rag in order to use all mounting locations that metal cloak designed for. The upper end of that same bracket bolts into a pre-existing threaded location using the hardware provided by metalcloak. I did need to relieve the metalcloak armor by the side of one of the resonators. I ended up, grinding it off, but if you could bend it out, that would be a more robust solution, but the metal was thicker and stronger than I was able to bend easily, and I did not want to heat it with a torch and ruining all of the zinc phosphate coating. The angle of the picture for the resonator relief is a little misleading. The armor comes well beyond the low point of the resonator and covers about 3/4 of the resonator and all of the other three.

IMG_2131.webp
IMG_2127.webp
IMG_2128.webp
IMG_2126.webp
 
I was able to adapt the metal cloak resonator skid to my rock, crawler exhaust system fairly easily. I needed to make the one bracket shown in the picture below on the yellow rag in order to use all mounting locations that metal cloak designed for. The upper end of that same bracket bolts into a pre-existing threaded location using the hardware provided by metalcloak. I did need to relieve the metalcloak armor by the side of one of the resonators. I ended up, grinding it off, but if you could bend it out, that would be a more robust solution, but the metal was thicker and stronger than I was able to bend easily, and I did not want to heat it with a torch and ruining all of the zinc phosphate coating. The angle of the picture for the resonator relief is a little misleading. The armor comes well beyond the low point of the resonator and covers about 3/4 of the resonator and all of the other three.

View attachment 36148View attachment 36145View attachment 36146View attachment 36147
Outstanding! Thanks for the information. I have a friend who does metal work. I'll get his help.

Thank again!
 
Hey all,

Thanks to this thread I just placed the order for the complete Undercloak skid set including resonator and muffler skids plus front and rear lower control arms bolt on skids. Added ARB front and rear diff covers to the mix.

Gets installed on July 23rd and I go on my first whelin trip with this 392 on July 28th. Can't wait!!

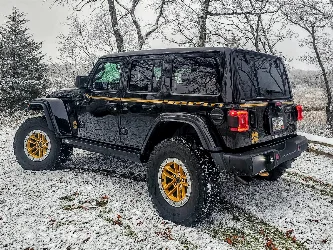
Next up will be the lift and 37s. Think I'll go with the Metalcloak 3.5 long arm kit, Metalcloak steering kit, Metalcloak baller joints and the rocksport blacks to keep the theme black and gold (the Jeep is black). Lol.

Can't wait!
 
We’re due for some ‘warm’ weather and I’ve been itching to finally install my skids. How difficult is it to replace the 2 motor mount bolts?
 
We’re due for some ‘warm’ weather and I’ve been itching to finally install my skids. How difficult is it to replace the 2 motor mount bolts?
Not really difficult you can get wrenches and sockets in there. I did it on the floor in my garage.
 
Last edited:
Hey all,

Thanks to this thread I just placed the order for the complete Undercloak skid set including resonator and muffler skids plus front and rear lower control arms bolt on skids. Added ARB front and rear diff covers to the mix.

Gets installed on July 23rd and I go on my first whelin trip with this 392 on July 28th. Can't wait!!

Next up will be the lift and 37s. Think I'll go with the Metalcloak 3.5 long arm kit, Metalcloak steering kit, Metalcloak baller joints and the rocksport blacks to keep the theme black and gold (the Jeep is black). Lol.

Can't wait!
Do your research on long arms based on how you wheel
 
Do your research on long arms based on how you wheel
Yeah my build has evolved since I posted this.

Damaged my MC skids on the last outing and my Jeep is now in the shop getting NVM skids installed.

I decided against long arms based on input from this forum and others and will now do RK 2.5 lift with 7075 Alum midarms
 
Thanks! Some people were making it sound like you need to take the fender off or use 3 feet of extensions.
The beauty of the Jeep is it takes 4 minutes to remove the fender
 
Thanks! Some people were making it sound like you need to take the fender off or use 3 feet of extensions.
Nope you can easily get in there start with a flash light then you can just feel your way through it.on the flush mount stainless Allen head frame blots put some white grease or anti seize on them
 
Last edited:
Knocked it out today, some tips for those taking it on - come from below on the motor mounts, the drivers side is easy, the passenger side is tighter, but you can fit your hand in through a gap in the fender liner by the bolt, use a 6” extension. The gas tank skid is cumbersome to do alone, but possible. A floor jack would help, but I just did some mechanic yoga and used my legs and feet to hold it up while I got a couple bolts in place. Also, a small pry bar helps align the final holes.
 
Knocked it out today, some tips for those taking it on - come from below on the motor mounts, the drivers side is easy, the passenger side is tighter, but you can fit your hand in through a gap in the fender liner by the bolt, use a 6” extension. The gas tank skid is cumbersome to do alone, but possible. A floor jack would help, but I just did some mechanic yoga and used my legs and feet to hold it up while I got a couple bolts in place. Also, a small pry bar helps align the final holes.
Yes floor Jack is the way to go
 

Create an account or login to comment

Join now to leave a comment enjoy browsing the site ad-free!

Create account

Create an account on our community. It's easy!

Log in

Already have an account? Log in here.

Back
Top