- Jun 27, 2024
- 425
- 1,098
- Current Rides
- 2024 392 x2, 1997 TJ, 2025 McLaren Artura Spider, 2024 F450, 1954 Jeep M38A1, 1996 Mazda Scrum KEI Truck
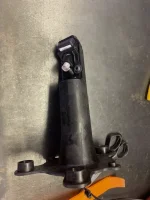
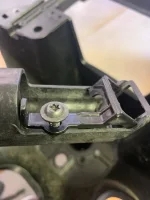
I would stray away from this style as if you need to remove the plate, it's kind of a pain to unhook, even with quick disconencts of some sort. We use this style that slips between the plate and the bracket.Artec has the LED lights as an option. I did not need them but they're ~$24.00. They mount in the same two upper mounting holes of the license plate itself, or you can mount them in the two holes near the upper left & right of the Artec panel.

License Plate LED Lights and Harness Kit
ARTEC License Plate LED Lights and Harness KitAdd LED lights to your spare tire delete for your license plate.Artec Industries has pieced together this light and harness kit to allow you to easily wire up license plate lights on your new spare tire delete. Includes: Qty: 2 Miniature Dual...artecindustries.com
This video shows with the lights installed.
https://www.quadratec.com/p/quadratec/led-license-plate-light-jeep-wrangler-jl