Full Skar Audio build in a 2021 392 Wrangler - Photo Intensive!

Skar Audio

Member
Joined
Apr 24, 2024
Messages
6
Reaction score
14
Location
St. Petersburg, FL
Current Rides
2021 Rubicon 392
Hello everyone!

We wanted to showcase a recent build we did in a close friend's Jeep 392 Wrangler using some of our products. One of the key components in this build is our VS-1X10JWJL-2018-UP-L subwoofer enclosure that we designed in house by hand to utilize the space between the rear roll bar and the rear seats and allow you to add a 10" subwoofer with ease! We plan on doing more product development for the Jeep JL/JLU platform, so keep an eye out for some pretty awesome products coming soon!

3v4t8dt4

mscup64r


Build List:
Skar Audio VS-1X10JWJL-2018-UP-L subwoofer enclosure (Designed Specifically For The JLU Platform)
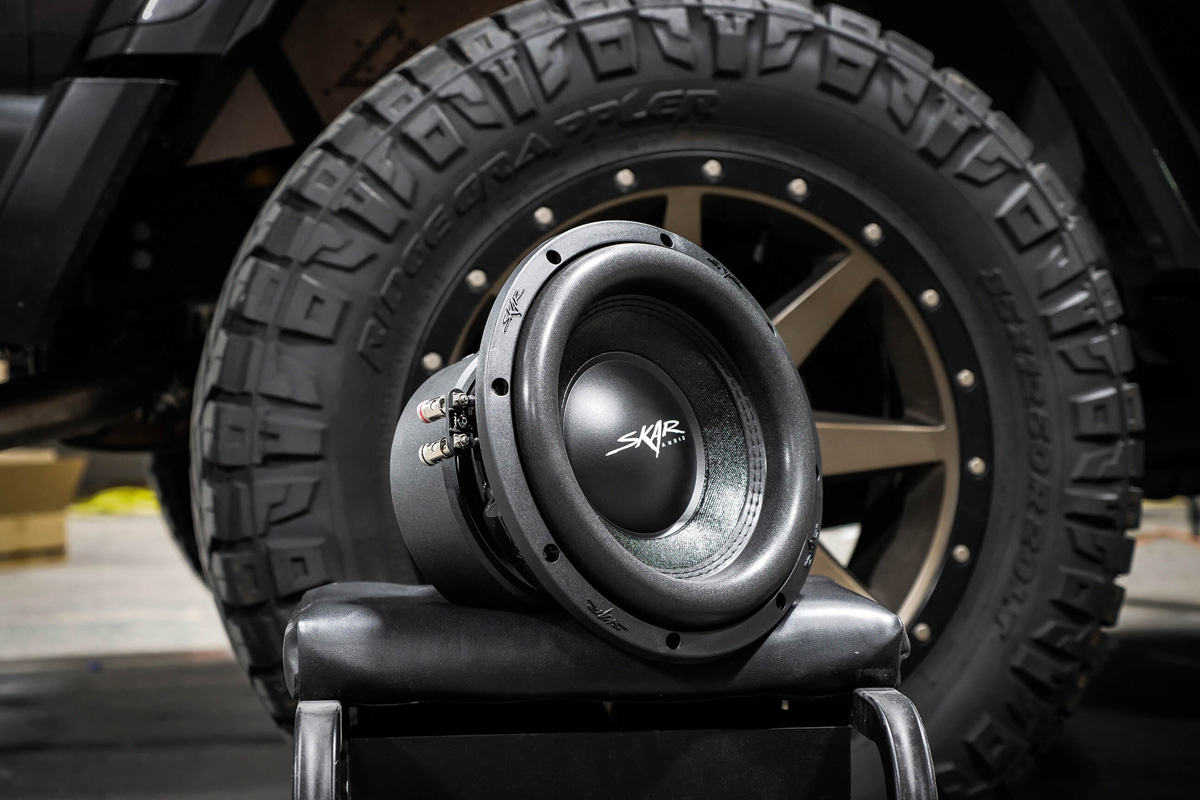
Skar Audio SVR-10 D2 800 Watt RMS / 1,600 Watt MAX 10" Subwoofer
Skar Audio RP-800.1D 800 Watt RMS Class D Monoblock Amplifier
Skar Audio SK-M4004D 400 Watt RMS Class D 4-Channel Mini Amplifier
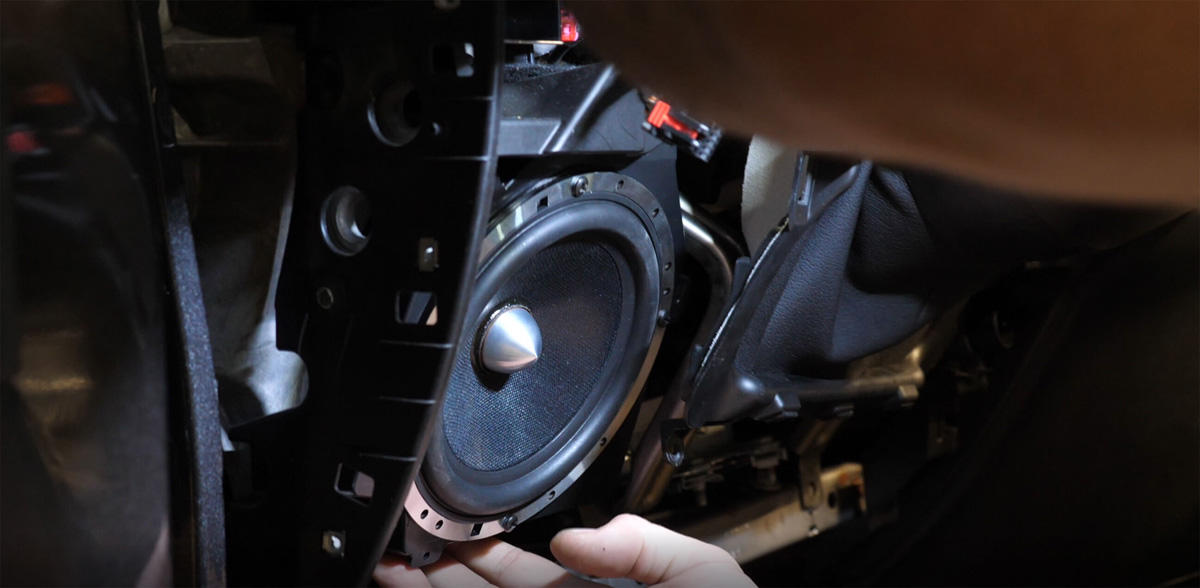
Skar Audio TX35 3.5" 120 Watt Coaxial Speakers
Skar Audio TX65 6.5" 200 Watt Coaxial Speakers
Skar Audio SPX-65C 6.5" 400 Watt Component Speakers (Woofers Only)
Skar Audio SKAR4ANL-OFC 4 Gauge OFC Wiring Kit
Skar Audio SKAR8MANL-OFC 8 Gauge OFC Wiring Kit
Skar Audio SKAR2CH-RCA12 12' 2channel RCA Interconnect Cable
Skar Audio SK-FUSE-BLK-PROANL Pro Series Inline ANL Fuse Holders
Skar Audio SK2800HZBB-PR Frequency Filters
PAC AP4-CH41 (R.2) AmpPRO Amplifier Integration Interface Module
PAC APH-CH03 Speaker Harness For AmpPRO Module
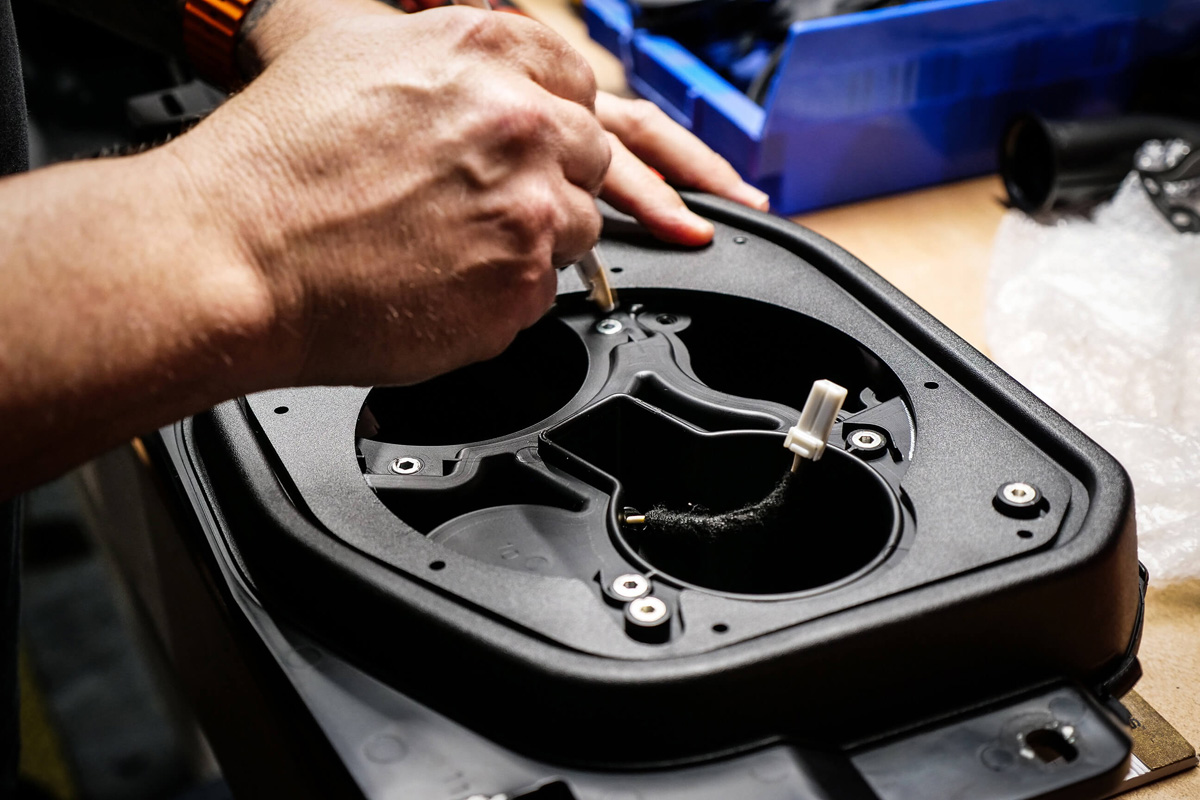
Metra JP-1014 6" - 6.75" Front Speaker Pods For Jeep JL/JLU/JT Models
Metra JP-1015 6.5" Speaker Adapter Kit For The Stock Soundbar In Jeep JL/JLU/JT Models

Next few posts will have the breakdown of each step!
 
Step 1: Running The Power Wires For The Amplifiers
We started off by removing the driver side lower kick panel and trim plastic that ran to the driver's seatbelt. The wire would be ran along the body and plastics to under the carpet where we eventually split the wires to their dedicated amplifiers.
JeepWranglerJLBuild-Wiring-1.jpg

JeepWranglerJLBuild-Wiring-2.jpg

JeepWranglerJLBuild-Wiring-3.jpg


Once the plastics were removed, we removed the grommet in the firewall located behind the brake booster. This will be our access point for the power wires into the cab of the vehicle. We drilled (2) holes and placed grommets into the holes to prevent the power wires from rubbing or snagging.
JeepWranglerJLBuild-Wiring-4.jpg

JeepWranglerJLBuild-Wiring-5.jpg

JeepWranglerJLBuild-Wiring-6.jpg

JeepWranglerJLBuild-Wiring-7.jpg

JeepWranglerJLBuild-Wiring-8.jpg

JeepWranglerJLBuild-Wiring-9.jpg


Luckily, there are pre-existing ground points by the legs of both the front driver and passenger seats, so we utilized them as ground points for the amplifiers.
JeepWranglerJLBuild-Wiring-10.jpg


Next, we fabricated a fuse holder mount out of high-temp ABS that will be placed in the engine bay.
JeepWranglerJLBuild-Wiring-11.jpg

JeepWranglerJLBuild-Wiring-12.jpg

JeepWranglerJLBuild-Wiring-14.jpg

JeepWranglerJLBuild-Wiring-15.jpg

JeepWranglerJLBuild-Wiring-16.jpg
 
Step 2: Mounting The Amplifiers Under The Front Driver And Passenger Seats
We wanted to make sure the amplifiers were out of the way so no better place than under the front seats! This required us to make (2) amplifier mounting plates out of high-temp ABS that would be held in place by the rear legs of each seat.
JeepWranglerJLBuild-Amplifiers-1.jpg

JeepWranglerJLBuild-Amplifiers-2.jpg

JeepWranglerJLBuild-Amplifiers-3.jpg

JeepWranglerJLBuild-Amplifiers-4.jpg


Once the amplifier mounts were completed, we started to disassemble the dash. This needs to be done to install the PAC AP4-CH41 (R.2) as well as the TX35 in the factory dash location.
JeepWranglerJLBuild-Amplifiers-5.jpg

JeepWranglerJLBuild-Amplifiers-6.jpg

JeepWranglerJLBuild-Amplifiers-7.jpg

JeepWranglerJLBuild-Amplifiers-8.jpg


The PAC AP4-CH41 (R.2) is vital if you plan to keep your factory head unit. This module allows you to convert the signal from the head unit to the factory Alpine amplifiers to RCA outputs. This module delivers clean signal and full functionality of your factory head unit.
JeepWranglerJLBuild-Amplifiers-10.jpg

JeepWranglerJLBuild-Amplifiers-11.jpg


Once the AP4-CH41 (R.2) was hooked up and secure, we hooked up the APH-CH03 speaker harness for the ProAMP module as well as ran some Speed Wire to the RP-800.1D and SK-M4004D amplifiers.
JeepWranglerJLBuild-Amplifiers-12.jpg

JeepWranglerJLBuild-Amplifiers-13.jpg

JeepWranglerJLBuild-Amplifiers-14.jpg


Finalized the wiring and mounted the amplifiers to their mounting plates and the amplifiers are now completed!
JeepWranglerJLBuild-Amplifiers-15.jpg

JeepWranglerJLBuild-Amplifiers-16.jpg
 
Step 3: Installing The Speakers In The Dash And Soundbar
Speakers are a huge thing when it comes to clear and crisp sound. We decided to utilize our TX35 3.5" Coaxial speakers in the top dash, SPX-65C 6.5" Component speakers (woofer only) in the bottom dash, and TX65 6.5" Coaxial speakers in the soundbar. We also used the necessary speaker pods and adapters from Metra to get all of our speakers correctly installed in this Wrangler 392.

We started this part of the install with wiring and trimming the Metra JP-1014 6" - 6.75" speaker pods to fit our SPX-65C Component speaker. With these pods being "universal" you will have to trim some of the pod to fit your new speakers as not all speakers are the same.
JeepWranglerJLBuild-Speakers-2.jpg


Next we wired up our SPX-65C Component speakers, added a foam ring around the mounting ring on the speakers, and added a layer of poly-fill to ensure the best sound possible when the owner turned up this system.
JeepWranglerJLBuild-Speakers-4.jpg

JeepWranglerJLBuild-Speakers-5.jpg


Last thing to do with the lower dash speakers was to install the new pods with our SPX-65C Component speakers. The pods fit great into the factory location and there was plenty of clearance for the SPX-65C Component speakers.
JeepWranglerJLBuild-Speakers-6.jpg


Now that the lower dash speakers are done we proceeded to do the top dash speakers. We replaced the factory speakers with out TX35 3.5" Coaxial speakers and connected a pair of our SK2800HZBB-PR frequency filters to make sure these 3.5" speakers would see the correct frequencies.
JeepWranglerJLBuild-Speakers-8.jpg

JeepWranglerJLBuild-Speakers-9.jpg


Next up is tackling the soundbar! We used the Metra JP-1015 6.5" Speaker Adapter Kit to install a pair of our TX65 6.5" Coaxial speakers. Now these adapters do require you to cut out the soundbar, but the kit makes it super easy with the metal plates being stencils, you cannot really mess this install up!

Here is what the factory soundbar looks like after you remove the grill. As you can see the factory speakers are quite small and do not provide much depth to your music.
JeepWranglerJLBuild-Speakers-10.jpg


You will use the metal plates provided in the Metra JP-1015 adapter kit to trace the out the area that will be cut and removed. You will need to remove the factory speakers from the soundbar before tracing.
JeepWranglerJLBuild-Speakers-11.jpg


Once traced, begin cutting. We used an air saw, but a jigsaw or even a Dremel will work.
JeepWranglerJLBuild-Speakers-12.jpg


After cutting out the holes in the sound bar we put the metal plates back on and then installed the 6.5" mounting adapters.
JeepWranglerJLBuild-Speakers-13.jpg

JeepWranglerJLBuild-Speakers-14.jpg

JeepWranglerJLBuild-Speakers-15.jpg


Lastly, we used the provided speaker harness adapters and soldered the leads to our TX65 6.5" Coaxial speakers and mounted them to the soundbar.
JeepWranglerJLBuild-Speakers-16.jpg

JeepWranglerJLBuild-Speakers-18.jpg
 
Step 3: Subwoofer Installation
We wanted to make sure this Jeep had some hard hitting bass so we made sure that happened. We used our brand new VS-1X10JWJL-2018-UP-L subwoofer enclosure that we designed in house to fit PERFECTLY in the left corner of a 2018-UP JLU without needing to cut up your plastics or modify your vehicle. We also offer a right side, meaning you can run a left and right to get even more bass. With this Jeep having the existing Alpine subwoofer, the owner did not want to replace the plastics with the OEM "non-Alpine" plastics, so we disconnected the factory subwoofer and used our enclosure and a 800 Watt RMS / 1,600 Watt MAX Power SVR-10 D2 subwoofer (way more power than the factory Alpine system)

First part of installing the Skar Audio VS-1X10JWJL-2018-UP-L enclosure was to connect the speaker wire from the RP-800.1D to the enclosure
JeepWranglerJLBuild-Subwoofer-2.jpg


This enclosure uses the factory hard top bolt to secure it in place making it a very easy install for anyone!
JeepWranglerJLBuild-Subwoofer-3.jpg


We made the speaker leads ready to wire this Dual 2 Ohm subwoofer to a final Ohm load of 1 Ohm at the terminal.
JeepWranglerJLBuild-Subwoofer-4.jpg


Lets talk subwoofers! The SVR-10 D2 that we used in this build features a 2.6" high-temp 4-layer copper voice coil, high roll surround, and a power rating of 800 Watts RMS / 1,600 Watt MAX. It is one of our top selling 10" subwoofers and it really gave this Jeep some heavy low notes!
JeepWranglerJLBuild-Subwoofer-1.jpg


Once the SVR-10 D2 was wired up, we installed it in to the VS-1X10JWJL-2018-UP-L and it looked great!
JeepWranglerJLBuild-Subwoofer-5.jpg

JeepWranglerJLBuild-Subwoofer-6.jpg


Step 4: Crank Some Tunes And Enjoy The New Skar Audio System!
That's a wrap with this Jeep. Below are some final shots of everything. With the dash speakers being hidden once the panels were back on they were hard to take photos of, but they are there, trust us.

JeepWranglerJLBuild-FinalProduct-3.jpg

JeepWranglerJLBuild-FinalProduct-4.jpg

JeepWranglerJLBuild-FinalProduct-5.jpg

JeepWranglerJLBuild-FinalProduct-6.jpg


What products would the Jeep crowd like to see when it comes to audio upgrades? We would love to have your input so we can tailor some new products to you and ensure your Jeep is sounding the best it can!

- Skar Audio
 
Curious about the bass response you ended up with from the lower dash speakers, after up-sizing to 6.5" drivers using the the Metro pods, due to the limited size of the enclosure. If enclosure isn't large enough, you won't get full potential from speaker. I realize poly-fill helps and speakers can be designed to work in smaller enclosure spaces, and some drivers are designed for free-air use.
There has been discussion about cutting a large hole in rear of Metro pod ....... DavidRam "I cut a hole and epoxied in the aperiodic vent."
So the driver sees the enclosure to be larger than it is, similar to porting an enclosure.
IMG-20200204-154907427.jpg


Looks like you used in-line filters to control/limit frequencies sent to speakers?
What did you use to tune the system, DSP built into the amps?
Or stand alone DSP?
Install looks great.


.
 
Curious about the bass response you ended up with from the lower dash speakers, after up-sizing to 6.5" drivers using the the Metro pods, due to the limited size of the enclosure. If enclosure isn't large enough, you won't get full potential from speaker. I realize poly-fill helps and speakers can be designed to work in smaller enclosure spaces, and some drivers are designed for free-air use.
There has been discussion about cutting a large hole in rear of Metro pod ....... DavidRam "I cut a hole and epoxied in the aperiodic vent."
So the driver sees the enclosure to be larger than it is, similar to porting an enclosure.View attachment 34611

Looks like you used in-line filters to control/limit frequencies sent to speakers?
What did you use to tune the system, DSP built into the amps?
Or stand alone DSP?
Install looks great.


.

We actually thought about some how modifying the Metra pods to utilize the existing tube port found in the OEM housing, but when it got down to it, we realized it wouldn't really be worth it with the subwoofer we were adding (there was PLENTY of bass coming from the SVR-10) The idea you posted would work, but you would loose the "punchiness" of the 6.5" with a large open hole in the back of it.

With the frequency filters, we only added them to the TX35 3.5" speakers to prevent bass from going through them. When doing this the 3.5" would act like a large tweeter which means a fuller high range than just a "tinny" sound you would get adding 1" dome tweeters up there.

As for tuning, our two installers/R&D guys have been in the audio industry for 30+ years so they tuned it via ear and using an array of SMD (Steve Meade Designs) tuning tools. Once I sat in the Jeep I was very impressed by the sound as I know this platform is not the easiest to get a system to work and sound like it should.
 
I'm interested in what you did. Looks like a very clean install. Curious what DSP you used for fine tuning and TA? I don't see it listed in equipment list.
I looked on Skar Audio web site, by clicking on amp links .... and description doesn't say amps have built-in dsp?

I asked about the frequency response you got from 6.5" drivers in pods, because I heard installers state that after going to the trouble to install 6.5" drivers in lower dash pods, they didn't end up with very low frequency response due to limited size of enclosure. And said if they were to do it again, they'd stay with same sized lower dash speaker, upgrade quality and just add power. As you know, a solid mid-bass up front, will make a big difference in a systems sound stage, along with a sub.
 
Last edited:
Step 3: Subwoofer Installation
We wanted to make sure this Jeep had some hard hitting bass so we made sure that happened. We used our brand new VS-1X10JWJL-2018-UP-L subwoofer enclosure that we designed in house to fit PERFECTLY in the left corner of a 2018-UP JLU without needing to cut up your plastics or modify your vehicle. We also offer a right side, meaning you can run a left and right to get even more bass. With this Jeep having the existing Alpine subwoofer, the owner did not want to replace the plastics with the OEM "non-Alpine" plastics, so we disconnected the factory subwoofer and used our enclosure and a 800 Watt RMS / 1,600 Watt MAX Power SVR-10 D2 subwoofer (way more power than the factory Alpine system)

First part of installing the Skar Audio VS-1X10JWJL-2018-UP-L enclosure was to connect the speaker wire from the RP-800.1D to the enclosure
JeepWranglerJLBuild-Subwoofer-2.jpg


This enclosure uses the factory hard top bolt to secure it in place making it a very easy install for anyone!
JeepWranglerJLBuild-Subwoofer-3.jpg


We made the speaker leads ready to wire this Dual 2 Ohm subwoofer to a final Ohm load of 1 Ohm at the terminal.
JeepWranglerJLBuild-Subwoofer-4.jpg


Lets talk subwoofers! The SVR-10 D2 that we used in this build features a 2.6" high-temp 4-layer copper voice coil, high roll surround, and a power rating of 800 Watts RMS / 1,600 Watt MAX. It is one of our top selling 10" subwoofers and it really gave this Jeep some heavy low notes!
JeepWranglerJLBuild-Subwoofer-1.jpg


Once the SVR-10 D2 was wired up, we installed it in to the VS-1X10JWJL-2018-UP-L and it looked great!
JeepWranglerJLBuild-Subwoofer-5.jpg

JeepWranglerJLBuild-Subwoofer-6.jpg


Step 4: Crank Some Tunes And Enjoy The New Skar Audio System!
That's a wrap with this Jeep. Below are some final shots of everything. With the dash speakers being hidden once the panels were back on they were hard to take photos of, but they are there, trust us.

JeepWranglerJLBuild-FinalProduct-3.jpg

JeepWranglerJLBuild-FinalProduct-4.jpg

JeepWranglerJLBuild-FinalProduct-5.jpg

JeepWranglerJLBuild-FinalProduct-6.jpg


What products would the Jeep crowd like to see when it comes to audio upgrades? We would love to have your input so we can tailor some new products to you and ensure your Jeep is sounding the best it can!

- Skar Audio
Nice install and attention to detail! 🤘 I bought some of your components for my golf cart.
 

7% off 2024 Jeep Wrangler 392 Granger Motors Just Bolt Ons.com MARK CDJR in Lake Charles Louisiana Underground Graphics

Latest Discussions

Back
Top