Navigation
Install the app
How to install the app on iOS
Follow along with the video below to see how to install our site as a web app on your home screen.
Note: This feature may not be available in some browsers.
More options
You are using an out of date browser. It may not display this or other websites correctly.
You should upgrade or use an alternative browser.
You should upgrade or use an alternative browser.
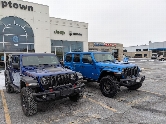
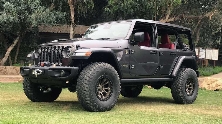
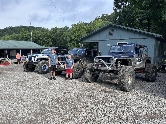
CJMore's Loki Build
- Thread starter CJMore
- Start date
- Thread starter
- #2
Wheels and Tires
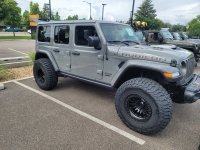
While this wasn't exactly the first upgrade to the Jeep it's where I'll start.
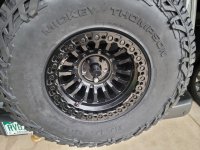
Tires - A set of Mickey Thompson Baja Boss A/Ts 37 x 12.5 R17 from Discount Tire
Wheels - Fuel RIcon beadlocks with Apex Performance 3.0 Rapid Precision Valve
Lug Nuts - Gorilla Automotive Lug Nuts
While this wasn't exactly the first upgrade to the Jeep it's where I'll start.
Tires - A set of Mickey Thompson Baja Boss A/Ts 37 x 12.5 R17 from Discount Tire
Wheels - Fuel RIcon beadlocks with Apex Performance 3.0 Rapid Precision Valve
Lug Nuts - Gorilla Automotive Lug Nuts
Last edited:
- Thread starter
- #3
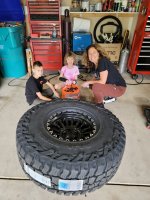
At our house the Jeep is a family project and everyone got to play installing the wheels, cause as you all may know, no major tire shops, at least here in CO. will mount Beadlocks.
If you want to know more about mounting these, how the torque has been set or is sitting etc. let me know!
Short answer is I've been pleasantly surprised!
If you want to know more about mounting these, how the torque has been set or is sitting etc. let me know!
Short answer is I've been pleasantly surprised!
Attachments
Last edited:
- Thread starter
- #4
Couple thoughts - Maybe it's because I'm 10 years older, but the mounting of these beadlocks was TOUGH. This wasn't a soap and hop on and they popped right on. NO this was a serious battle - Not what I was expecting. But we made it happen.
The Apex Performance 3.0 Rapid Precision Valve are AWESOME
If there's interest I may do just a quick driveway and trail vid on why these are must haves for our ride!
The verdict is still out on the Gorilla Automotive Lug Nuts - They're lug nuts so we'll see
These weight just over 100#s. IIRC stock was 85ish#
Last edited:
- Thread starter
- #5
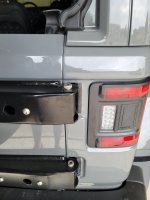
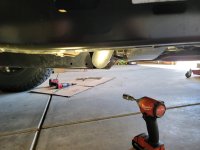
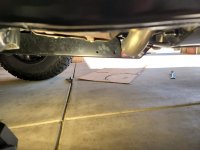
With bigger rubber comes Rusty's Offroad Tire Carrier upgrade w/ Hi Lift Jack Mount.
There's lots of great install videos out there and detailed reviews, but Rusty's stuff is solid.
A couple highlights that were present in my install.
If you're polling the sub panel off in the rear of the Jeep remember there's a screw tucked back in this cutout in the pic below.
Second I'm a full sized human and there's aspects of this install that are diffidently 2 person tasks.
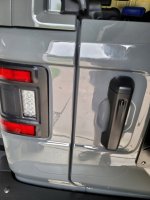
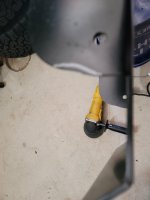
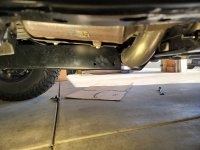
Rusty's tire carrier has a optional mount to the tailgate using Nutzerts near the handle. I test fit this a couple times, which means install, uninstall, install cycles but it was worth it.
There's a couple of shim options included in this kit, based on tire size and weight, ultimately it really boils down to tailgate alignment and I used nearly all the shims for proper alignment.
The (2) additional pics below is that trial and error fitting of various shim combos
Be sure to get the tailgate alignment RIGHT before you go through the nutzert process!
There's lots of great install videos out there and detailed reviews, but Rusty's stuff is solid.
A couple highlights that were present in my install.
If you're polling the sub panel off in the rear of the Jeep remember there's a screw tucked back in this cutout in the pic below.
Second I'm a full sized human and there's aspects of this install that are diffidently 2 person tasks.
Rusty's tire carrier has a optional mount to the tailgate using Nutzerts near the handle. I test fit this a couple times, which means install, uninstall, install cycles but it was worth it.
There's a couple of shim options included in this kit, based on tire size and weight, ultimately it really boils down to tailgate alignment and I used nearly all the shims for proper alignment.
The (2) additional pics below is that trial and error fitting of various shim combos
Be sure to get the tailgate alignment RIGHT before you go through the nutzert process!
Attachments
Last edited:
- Joined
- Sep 20, 2021
- Messages
- 1,881
- Reaction score
- 1,939
- Location
- Jacksonville FL
- Current Rides
- 2021 Rubicon 392 2006 LJR
I would like to hear more about the Rapid Precision Valves.Couple thoughts - Maybe it's because I'm 10 years older, but the mounting of these beadlocks was TOUGH. This wasn't a soap and hop on and they popped right on. NO this was a serious battle - Not what I was expecting. But we made it happen.
The Apex Performance 3.0 Rapid Precision Valve are AWESOME
If there's interest I may do just a quick driveway and trail vid on why these are must haves for our ride!
The verdict is still out on the Gorilla Automotive Lug Nuts - They're lug nuts so we'll see
These weight just over 100#s. IIRC stock was 85ish#
That setup weights just over 100lbs? My 35's on stock wheels weigh 108.
- Thread starter
- #7
I would like to hear more about the Rapid Precision Valves.
Apex vs Stuans on a 10 second test.
Apex dumps 12 PSI and Stauns dumps 3 PSI
If there's more interest on the next rainy day maybe we shoot some video with stock stems vs Apex deAir and Air Ups with a more scientific approach
- Thread starter
- #8
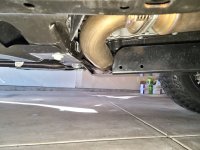
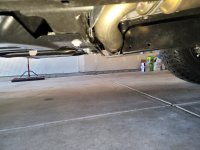
Sticking to the Rusty's theme
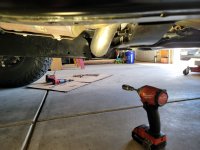
Met one of the fellow forum fellas @tstevens and bought the Rusty's Engine Skid Plate.
Install was pretty straight forward and instructions are good. Obviously you want the jeep to be ICE cold for this. Ask me how I know another time....
I used a transmission jack to assist in the process - You'll want ratcheting swivel head shorty wrenches to make this install reasonable - if not it's time consuming.
After I fit everything up I had a bit of an exhaust pipe "rub" and a knock on start-up.
See the pics below but a little love from the flap wheel and a shot of high temp paint - Custom
Attachments
- Thread starter
- #9
Yeah guess I forgot to mention. While I was elbow deep in the tail light end of the Jeep I replaced the PATHETIC stock LEDs with a Set of Flush Mounts from Oracle. I posted elsewhere on the forum about these but the backup light from these tails is AMAZING.
I'm a fan of the flush mounts as it give my tire carrier with the Hi lift mount plenty of swing room without a crunch.
A shop here locally is going back and forth with Oracle on their Blind Spot monitoring issue and I have it on good authority that a fix is in the works. If it's important to you stay tuned.
Great upgrade and worth it.
Last edited:
- Thread starter
- #10
More upgrades for the back of the jeep to be posted soon.
Versatable install and sh!t show story, USB Charger, Roof Rack, Epics Kracken with ARB twins, Bulletproof dash mounts and a few others all installed just need some write-up time - Stay Tuned
Versatable install and sh!t show story, USB Charger, Roof Rack, Epics Kracken with ARB twins, Bulletproof dash mounts and a few others all installed just need some write-up time - Stay Tuned
Jeep 392 Forum Favs 👍


Jeep 392 Photos
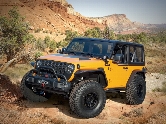
Jeep 392 Photos